PenTeleData would like to welcome you to "My PenTeleData Webmail." Just below, we have provided a brief tutorial of the more commonly used functions of our web based e-mail system. In the event that you have a question, or trouble accessing your e-mail account using "My PenTeleData Webmail," please call our Technical Support Department and follow the menu to get Residential Technical Support.
Once you have successfully logged in to "My PenTeleData Webmail," you will see the following screen.
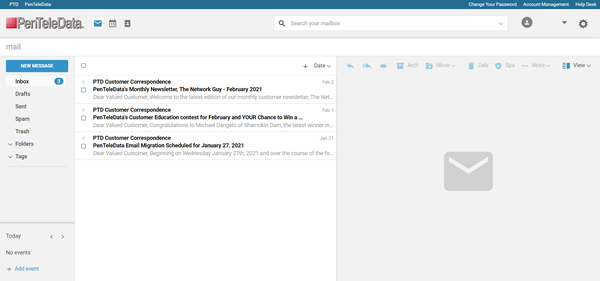
Choosing any message from the left pane will display on the right pane. Just to note, this display can be modified or changed later through this document. All NEW messages in the above window will appear bolded. Moving between new messages, the bold will be removed, marking the message as read.
While scanning through messages, you may notice that image content is missing. To correct this, you will need to choose the option “Click to load,” as displayed below.

Moving forward, we will review the key features, action items, and other configurations that are available to you while accessing Webmail.
-The quick action icons that are presented within My PenTeleData Webmail.
NEW MESSAGE – Creates a new email message (More information on composing to follow).
While in any folder view, will allow you to select all messages within that view and folder only. Allowing you to delete, move, etc.
The ![]() - Allows you to reply to a selected message intender for the originating sender.
- Allows you to reply to a selected message intender for the originating sender.
![]() Is the option that will allow you to reply to all recipients listed within that message.
Is the option that will allow you to reply to all recipients listed within that message.
![]() Will allow you to forward the message, just add your recipient, and click send.
Will allow you to forward the message, just add your recipient, and click send.
Archive - Will move it to the “Archive” folder, for saving and later review. Simply select your message, or if you want to include multiple messages, use the □ to make your selection(s).
Move – Allows you to move messages. Either by choosing the □ to select all from the action menu, or just to the left of the message within your folder view. Select your message, and choose “Move,” select the folder you wish to move the message too.
Delete – Will simply delete any unwanted to message. Either individually, or by all, choosing the same □ option within that folder.
NOTE: Please be careful of the messages you delete, once the message is gone, and trash is empty, PenTeleData cannot recover it for you.
Spam – Select any junk email that you have received and click “Spam.” The message will be removed and sent to your “Spam” folder. After 30days, the spam messages will automatically be removed.
NOTE: As with some messages, spam is based on a point scale, you may find a message that was not intended to be marked as “Spam.” Simply move this message to your Inbox. Periodically, review this folder for messages in the event of mislabeling. The “Spam” option is a learning system, the more junk you move there, it will collectively learn from it.
The remaining action items, “More,” “View,” and “Date:”
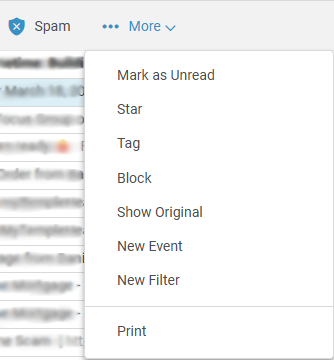
Mark as Unread – Reviewing the message, but don’t have time to “Reply,” Forward,” etc? If you want to get back to the message, simply choose “More,” and next “Mark as Unread.” It will aid as a reminder to return to that message.
Star – Similar to “Mark as Unread.” Choosing this option will display a star within the messages pane.
Tag – Will allow you to group messages by a specific “Tag,” that you create. Will sort, and find messages related to this “Tag.”
Block – Will block the sender and will automatically place the message in the Trash folder.
Show Original – Will aid with troubleshooting as to why a message failed to send.
New Event – Choosing this option will bring up the Calendar page, allowing you to set time and dates accordingly on the specified event you want to create.
New Filter - Will generate the “Add New Filters” window (more on this topic to follow).
Print – will print the specified item, calendar, or message.
NOTE: In some cases, you will need a chromium-based web browser to support the print feature.
The last part of the action items from the menu:

View - Will allow you to change the appearance of how your messages will appear within the webmail overview. Any changes made will be saved when accessing webmail.
Date – Of course the date the message was either sent or received, based on the folder you are currently reviewing. Also to note, you can also sort by date if and when needed.
Search your mailbox: This will find contents of your desired criteria that you entered. It will search for messages, photos, and documents. You can also narrow down your results with a “Refine” feature if you do not find exactly what you are looking for. It also includes a “Save Search” feature in the event you need to use the same search information at a later time or date. To note, this Search will scan all folders, and calendar of events.

Example search results with the additional items as noted just above, which displays the “Save Search” and “Refine” options.

Composing New Message: To create a new email, click on “NEW MESSAGE.” Enter the email address you would like to send too, enter a subject, add your message to the body of the email. When done, click “Send.”

The new message composer has editing options along the bottom. Simply hovering your mouse over these items will provide a brief description of what each option completes.

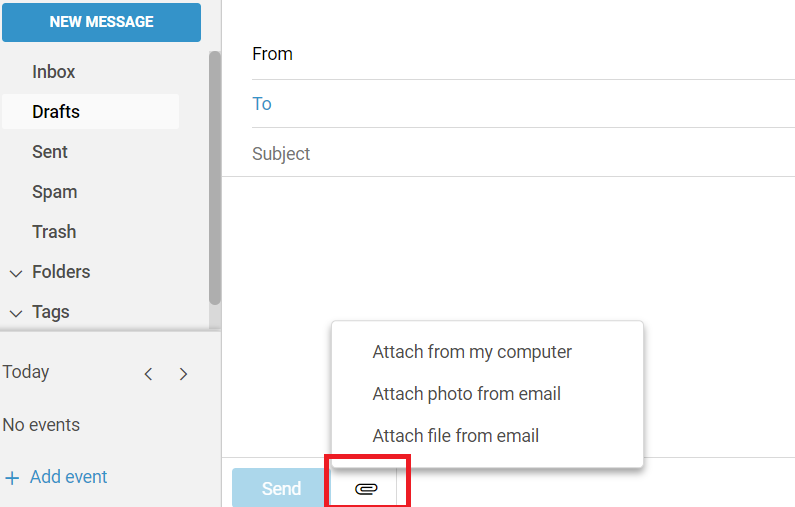
Adding Attachments: If you wish to add a file, picture, or other file form attachment, simply choose the paper clip option to browse and select which file you wish to attach to your message.
Calendar: Choosing this option will bring up your calendar. From here, you can add events, add users to the meeting, send invites and schedule. Calendar view will break down by Today, Day, Work week, etc.
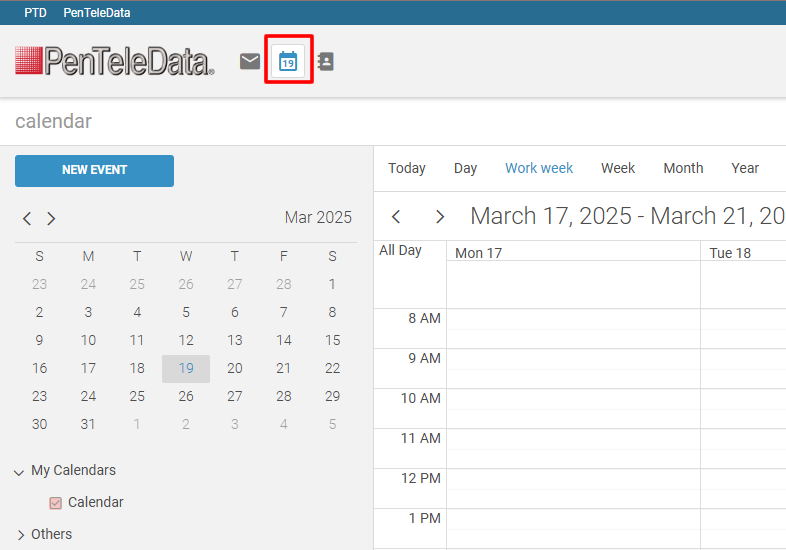
NEW EVENT: Will open the “Add Event” dialogue. Enter your event details, choose “Save” when done.

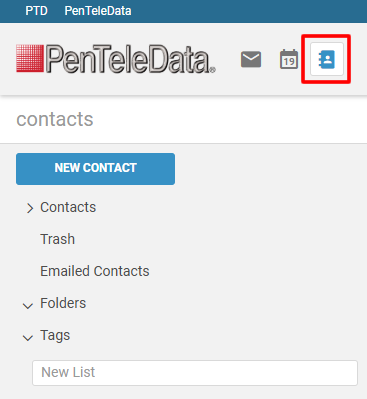
Contacts: Choosing this option will bring up your contact list. From here, you can add a specific user by simply clicking on “NEW CONTACT.”
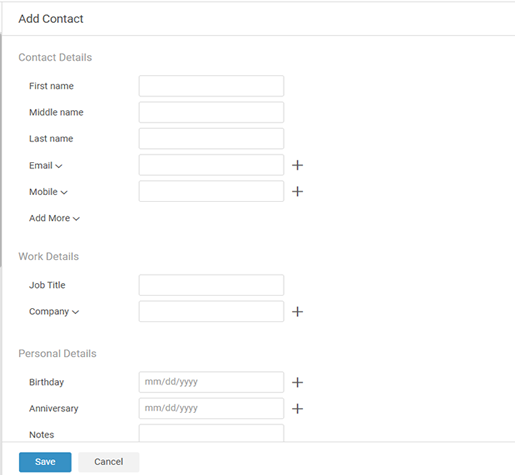
Add Contact: Enter the personal information for the contact, choose “Save” when done.
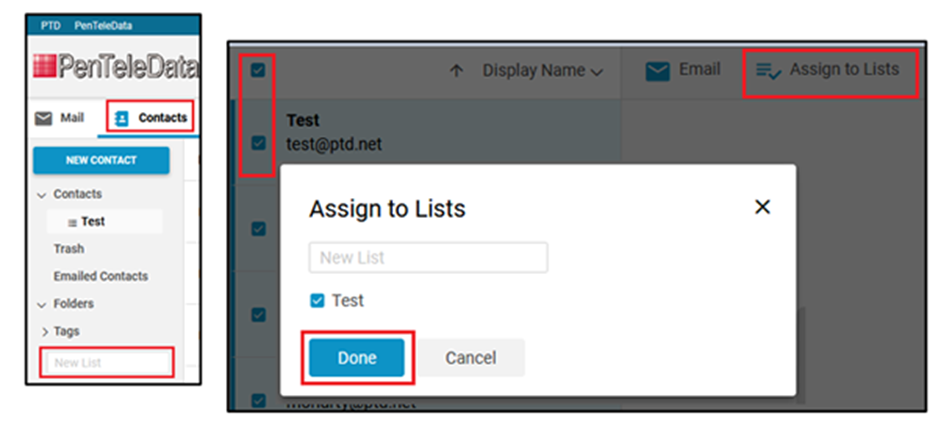
Contact List: To create a contact list within Webmail, click on the “Contacts” tab. In the box labeled “New List,” type in a name for the new list and click “Enter” to create. To add email addresses, place a checkmark to the left of the email addresses that you wish to add and then click “Assign to List.” A new list can be created or by editing an already-existing one used. Either choice is fine, click “Done” to finish.
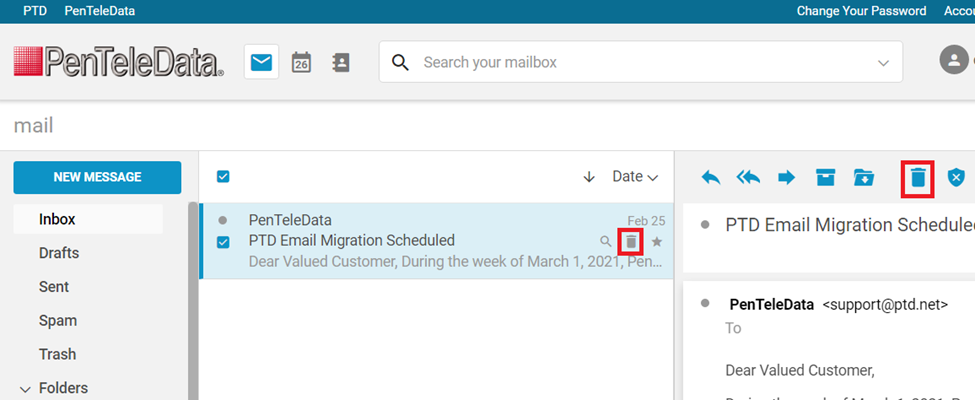
Deleting a Message: If you want to delete a message, you have several options. Select your message and choose one of the following delete options.
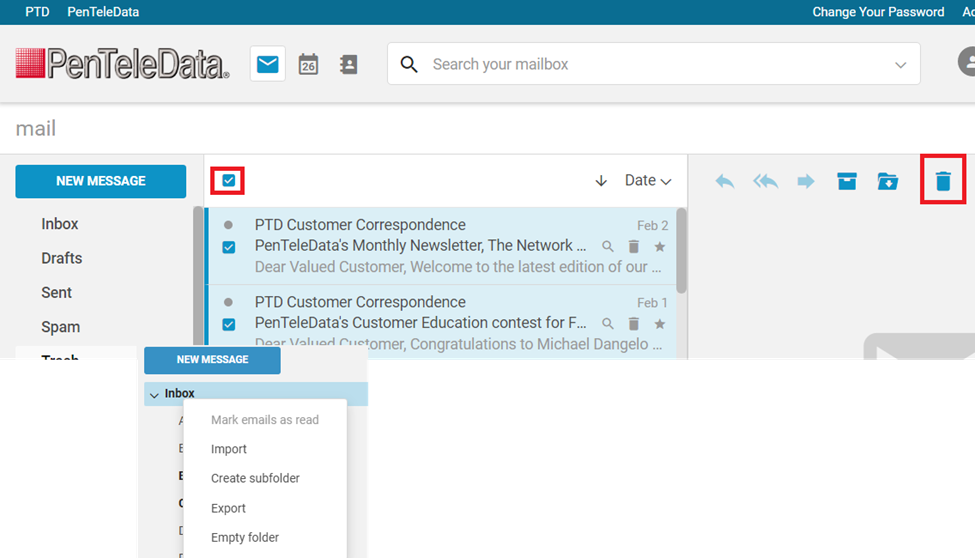
Deleting Multiple Messages: Choose which messages you would like to delete by individually selecting the checkbox to the left of each message. For those wishing to clear an entire list of messages within the preview pane, you can choose the uppermost checkbox. When done select the delete option.
Those wishing to empty a folder, choosing the empty check box on the quick action menu will allow you to select all, rather than picking individual messages. Alternatively, click on the folder of your choosing with right mouse button, next, select, “Empty Folder.”
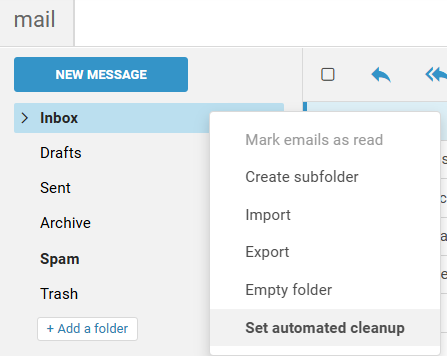
Set automated cleanup: To enable this feature, simply click on your inbox. Once selected, using your right mouse button, scroll down and select “Set automated cleanup,” pictured below.
NOTE: Using “Inbox” as an example for this tutorial. However, you can perform “Set automated cleanup” on any subfolder, under your “Inbox,” including “Drafts,” “Sent,” and “Archive.” The “Trash” and “Spam” folders are already on a cycled removal schedule.
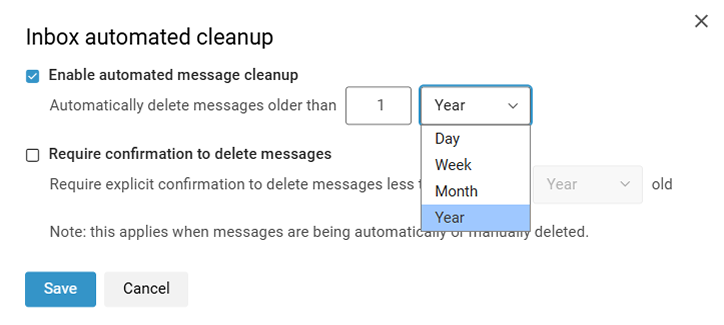
- Using this feature enables you to create a scheduled removal of email, older than whichever criterion you choose. Whether a Year, Day, Week, or Month. Make your preferred selection, enter a # within the available field, it you want 10 Day, 18 Months, etc. Whichever choice you choose. The cleanup process will begin. Below, you will also have the option to, “Require confirmation to delete message.” Making this selection will prompt you regardless of automatically (Automated clean up), or manual action removing messages. When done, choose “Save." If you prefer to set it up at a later day, choose “Cancel.”
NOTE: Please be mindful when setting up these options. When you choose to delete, once the message is gone, and trash is empty, PenTeleData cannot recover it for you.
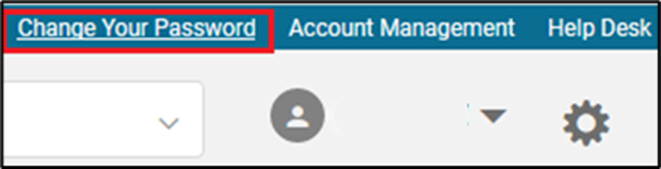
Change Password: If you would like to change the password for your PenTeleData e-mail address, direct access can be found by clicking “Account Management” or click the “Change Your Password” link located in the upper right of Webmail. This will bring you to the Account Management page where you can make the change.
Account Management – For more information gives you additional access to your account settings. Click HERE for more information.
Help Desk – Will return you to the main www.ptd.net home page. From here, you can reach live support or choose the contact link to find which department you would like to speak with.
Avatar
Action items:
Changing Profile Image: You have the ability to upload a profile image. We recommend a minimum size of 280px x280px.
Logout – Will log you out of your webmail session
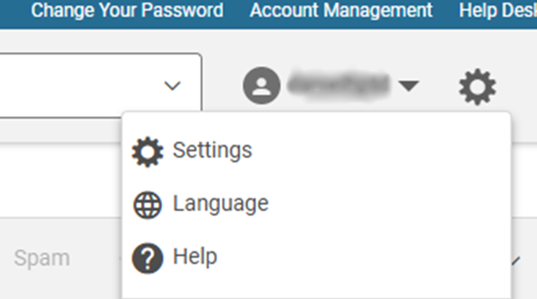
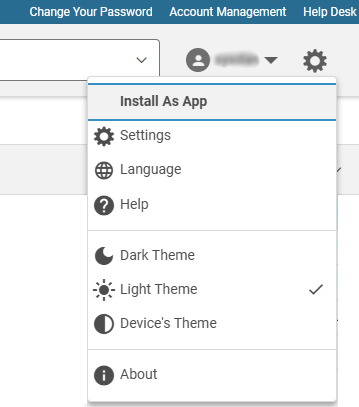
Setting and More: Choosing this option will bring up several other advanced options for usage. Reading further will give you a brief outline of the functions and features within. First and foremost, you can change the display settings, Light Theme, Dark Theme, and lastly, Device Theme. Device theme is based on your user settings within Microsoft Windows, or Macintosh Apple.
Note: “Install As App,” will provide you direct access from your desktop. Please be advised that this install option will only appear under Microsoft Edge and Google Chrome. Firefox users will be required to download a plug-in, which is not supported by Technical Support.
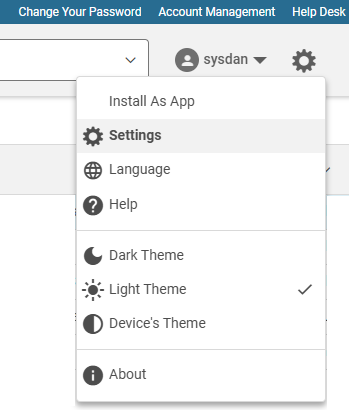
Moving forward and choosing “Settings.”
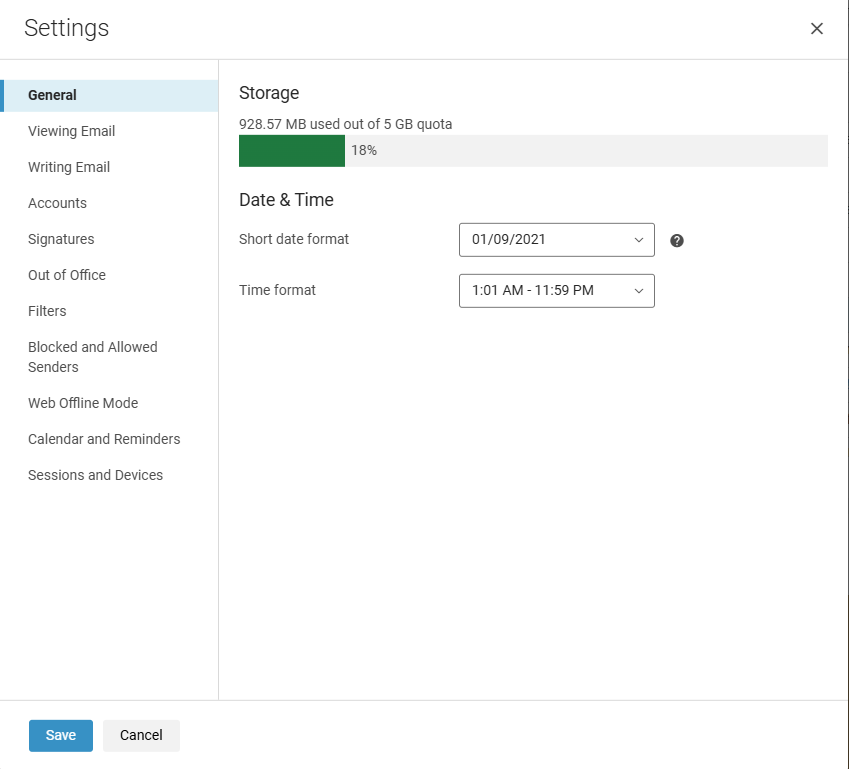
General: Displays your current “Storage” space utilized with your mailbox. You can also adjust your “Date & Time” format.
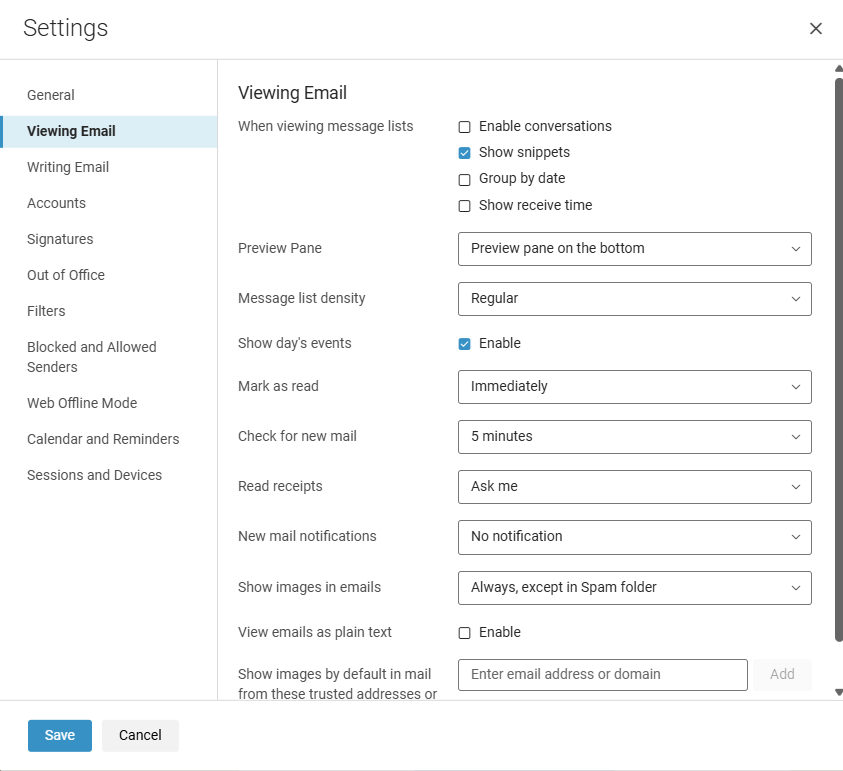
Viewing Email: To change the way your email is displayed, click on the gear and select “Settings” > and choose, “Viewing Email.” Within this windowpane, you can choose to change your preview pane, show images. When done making your selection, select “Save.”
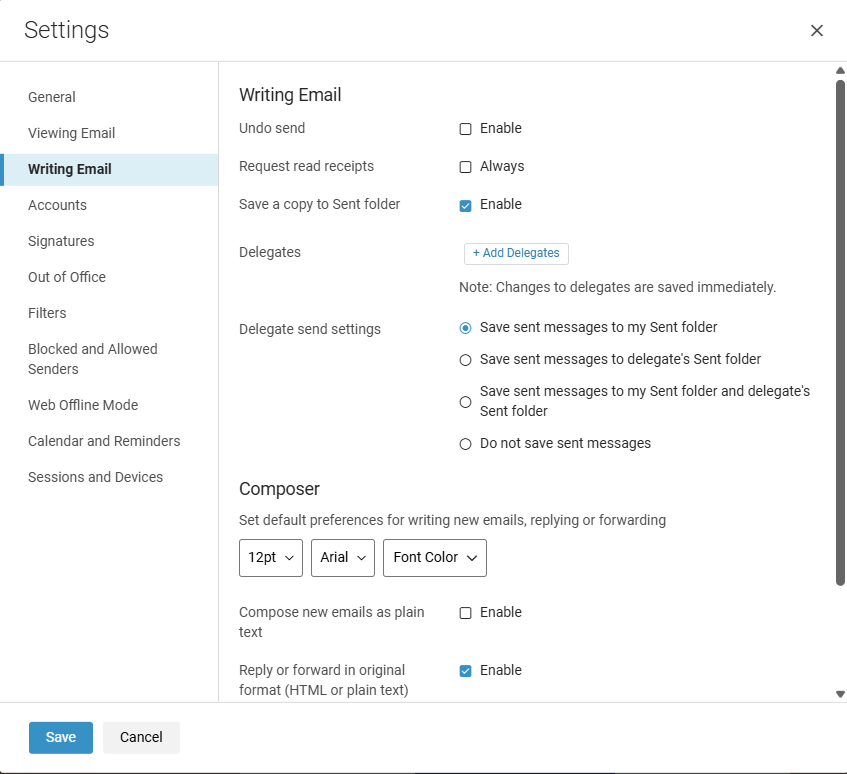
Writing Email: Allows several additional features, with an undo send option, in the event you sent in error. Keeping in mind that you only have a small window of less than 5 seconds. Read receipts, will send you a notification if the intended recipient reads your email message. To note, not all mail servers are configured to send this type of reply. So, if you do not get the notification, that possibility may exist. Changing default font preferences can be located here, as well as composition alignment as you draft a new email message.
Accounts: Allows several different account modifications.
Name - You can edit/modify this field to identify you when sending off a message to any recipient. In this example, it would appear as username in the recipient’s mailbox.
Reply-to address - If you would like to send from this account but receive any or all of your replied email to appear in another account.
Forward your mail to another account – If you would like to set up a mail forward, you may do so here, alternatively, this can also be done in “Account Management.”
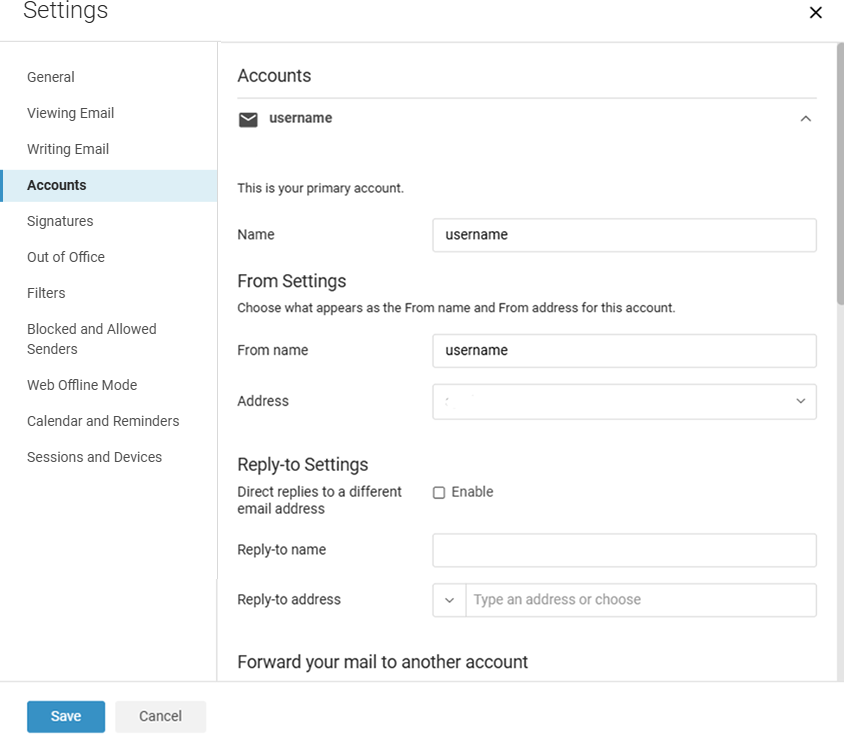
Note: If you are not able to see the “Account” settings dialogue window, please choose the arrow to the far right (example):
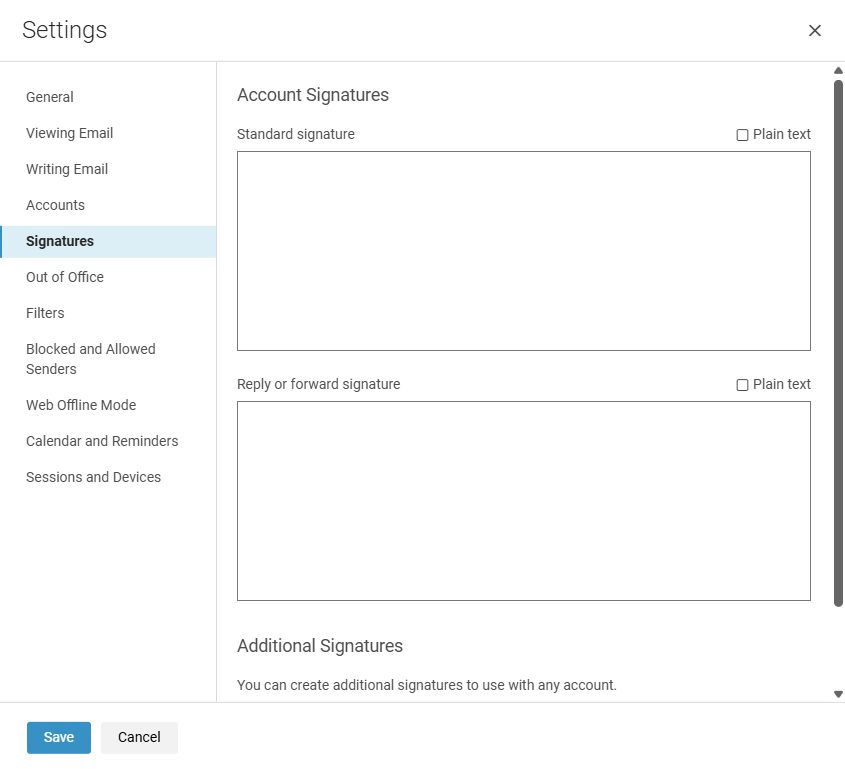
Signatures: Will allow you to add a signature file to out bound email, either via new message, or when replying/forwarding.
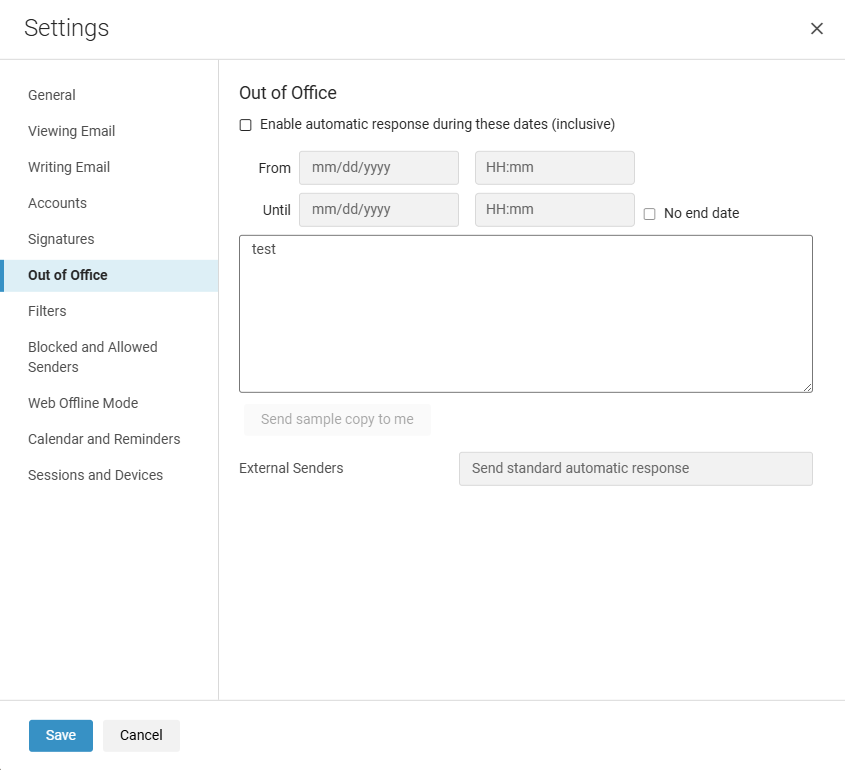
Out of Office – As it states, if you were to go on vacation or away for sometime and do not want to actively look at email, you can set up a notification that will inform your senders of this. Simply enter a check mark in “Enable automatic response during these dates (inclusive).” Enter your dates, and times of your absences, and fill out a form greeting, notifying them of your absence.
NOTE: Upon returning, please make sure to disable this feature, by removing the check mark from “Enable automatic response during these dates (inclusive).” Also please be advised, out of office replies will only generate once every 7 days, per unique sender.
Filters: Email filtering is the process of recognizing specific criteria by data that you chose to enter during the “Add a filter” process. Therefore, discarding messages that meet this criterion such as subject lines, the sender’s email address, email content, date, size, etc. before it reaches your inbox.
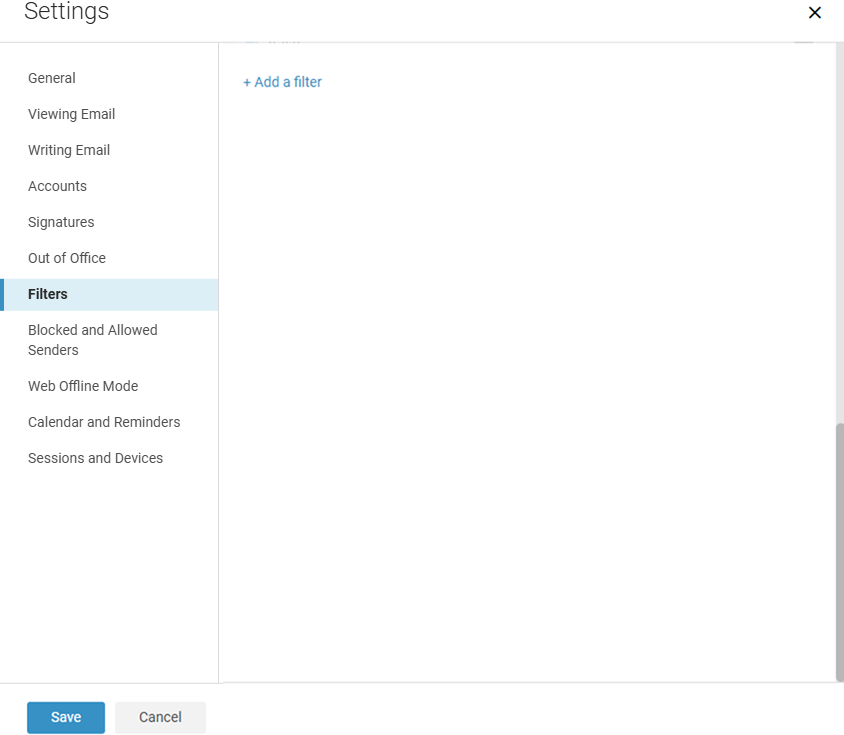
Add a filter:
Click on “Add a filter,” and then choose “Basic or “Advanced” to continue. Mail filters operate on inbound e-mail traffic. Inbound email filtering involves scanning messages to users protected by the filtering system.
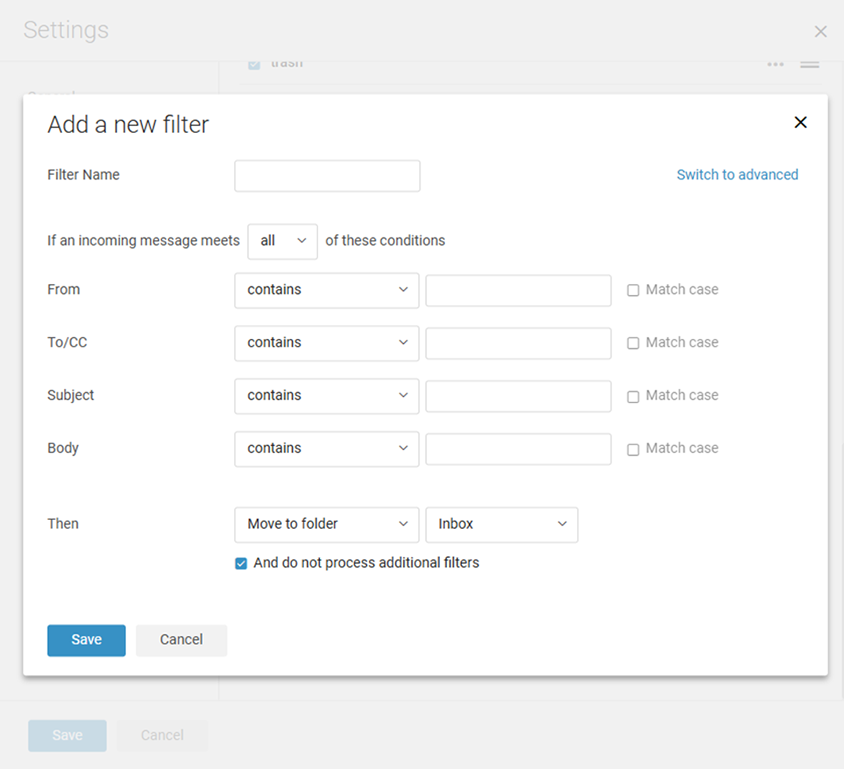
Add a “Filter Name.”
The “Filter Name” is a description of the rule being created and is used to label the filter in the event there is more than one listed.
“If an incoming message meets:” only has the options of “any” or “all.” If this is set to “all,” the email must meet every condition that is made inside of this filter and is better used when filtering email with a specific subject or sender.
By default, the filter is set to “From.” You have the ability to add multiple criteria for the email filter to use.
To add a new condition, click “Add a condition.” To remove a condition, place the mouse pointer to the right of the condition and click “X.”
The section “Then,” informs the filter what to do with the e-mail. There are various options listed. Keep in mind if when choosing “Permanently delete,” you may lose an email that you preferred to keep.
When finished click the “Save” button to activate the filter.
NOTE: If you only intend on blocking one email address, remember from the main webmail interface, you can simply right click on any email message, and choose, “New Filter.”
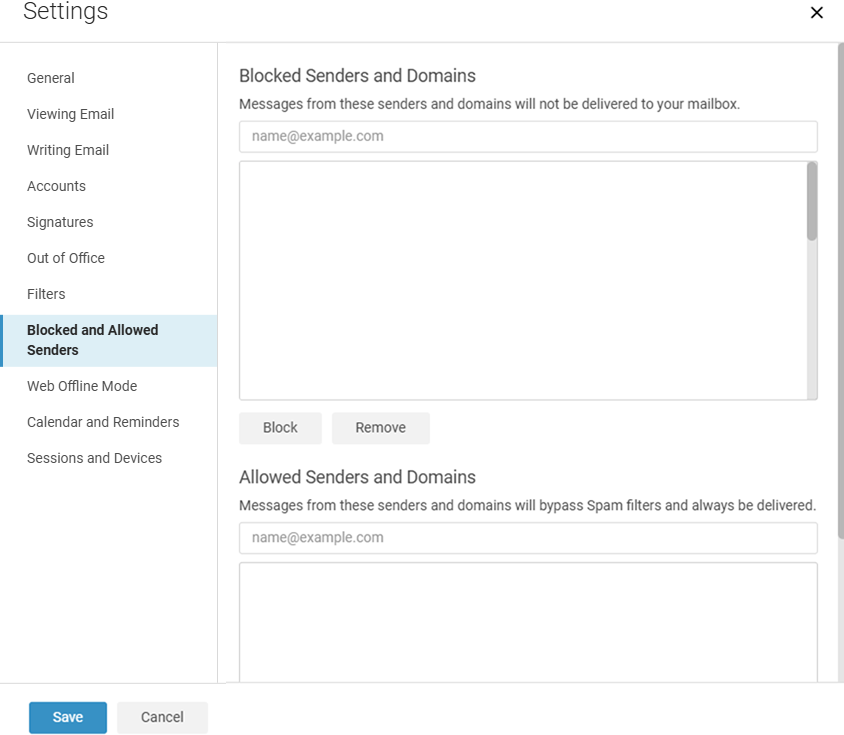
Blocked and Allowed Senders Settings: If you are having issues with Spam, click on the gear and select “Settings” > “Blocked and Allowed Senders,” and add either addresses or the entire email domain (example: idontwantspam.com). You can also allow addresses and domains. If you feel you may not be receiving an email message from a specific sender, you can review and remove from here as well.
NOTE: If you only intend on blocking one email address, remember from the main webmail interface, you can simply right click on any email message, and choose, “Block.”
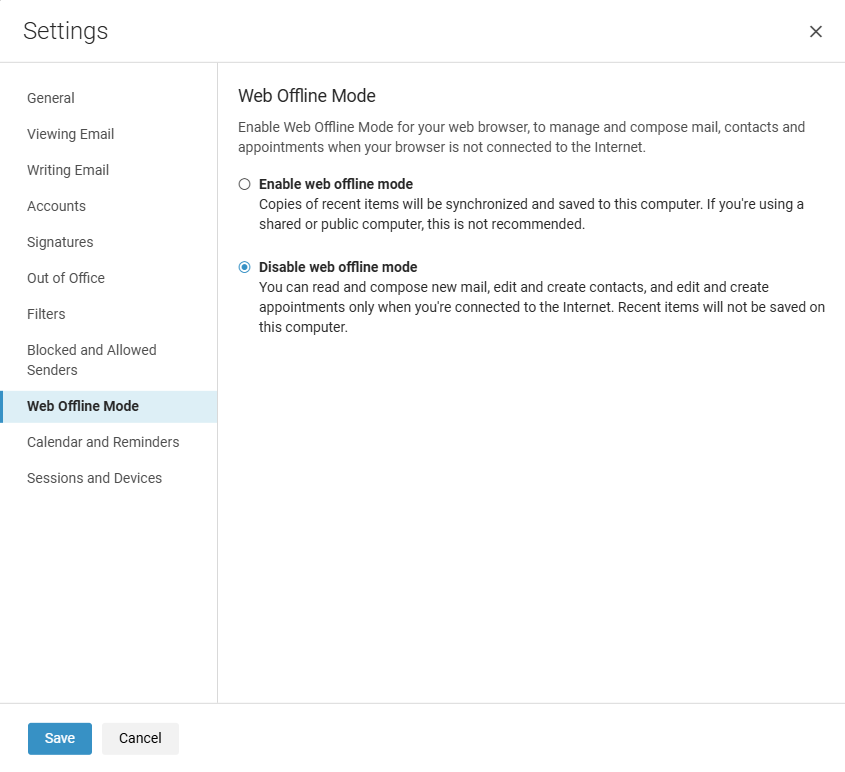
Web Offline Mode: Using this mode will allow you to compose, manage contacts, calendar events, etc. when you are not connected to the Internet.
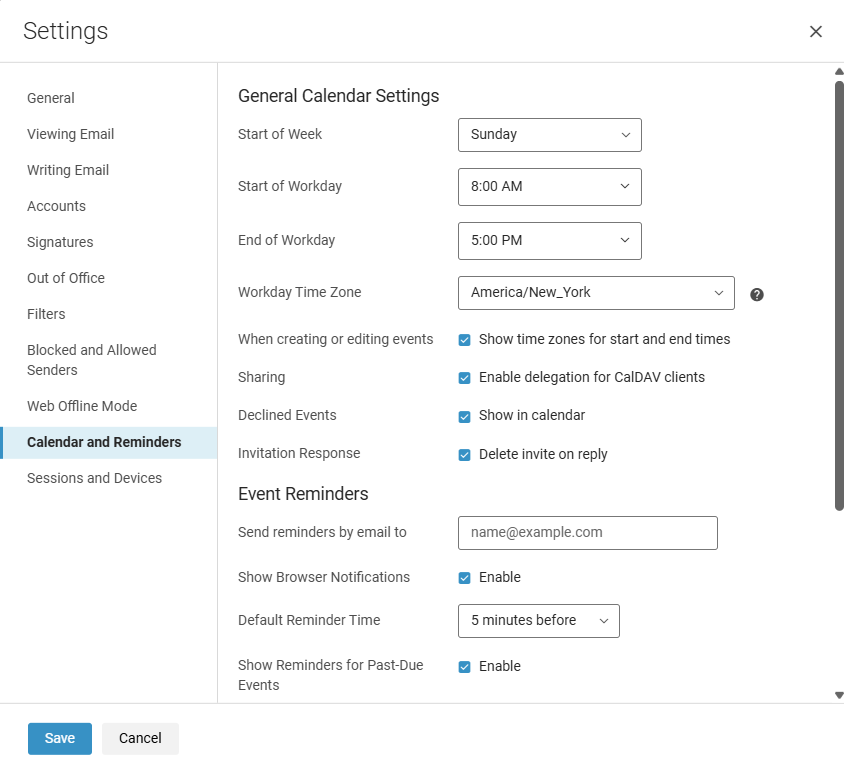
General Calendar Settings: With this feature, you can schedule and plan events, send out meeting reminders, etc. It will give you the ability to modify your work hours, start of work week and other configurable options.
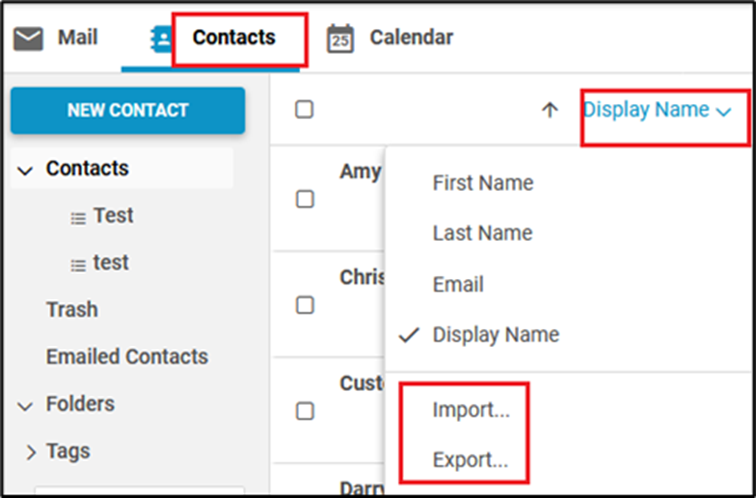
Importing/Exporting: You can import contact lists and address books that are saved in a comma-separated (.csv) or .vcf file. After the contacts are imported, they are alphabetized by first name in your address book.
Go to “Contacts,” select “Display Name” and finally “Import/Export.” Click “Import,” then browse, and locate the .csv/.vcf file to import and select.
Once located, click “Open.”
Click “Import.” Depending on the size of the file, the import might take a few minutes. When the import is complete, click “Contacts” to review the additions.
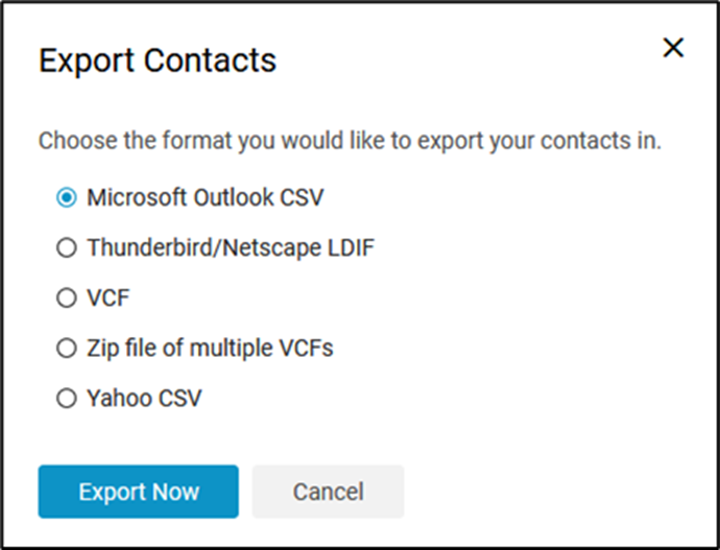
Exporting Contacts: You can export your address books to several file formats (.csv, Ldif, vcf).
Choose “Export” from the options under “Display Name.” Select the format and click “Export.”
From the “Export Contacts” pop-up, choose the appropriate file type, select “Save File” and click “OK.”
NOTE: Depending on how the other email program was configured, it is possible for the contacts list not to import properly. If the listing does not appear you will need to manually correct the information within the Webmail program.
Sessions:
Will display all active sessions logged into your email account.
If you simply do not recognize a log in, simply choose “Sign out” to the corresponding device.
Please note, if you do reach this setting, one device will always be listed, as you’re actively logged into your account.
If you do choose the “Sign out,” on an unrecognizable device, we strongly recommend that after “Sign out” is selected, please change your password. This can be completed by choosing “Change Your Password” within the webmail interface (located upper right of webmail).

Help: For further assistance with the webmail interface, choose the “Gear” within the upper right of the webmail interface, select “Help.” This will take you the support site for “Zimbra.”