Webmail Tutorial
PenTeleData would like to welcome you to "My PenTeleData Webmail." Just below, we have provided a brief tutorial of the more commonly used functions of our web based e-mail system. In the event that you have a question, or trouble accessing your e-mail account using "My PenTeleData Webmail," please call our Technical Support Department and follow the menu to get Residential Technical Support.
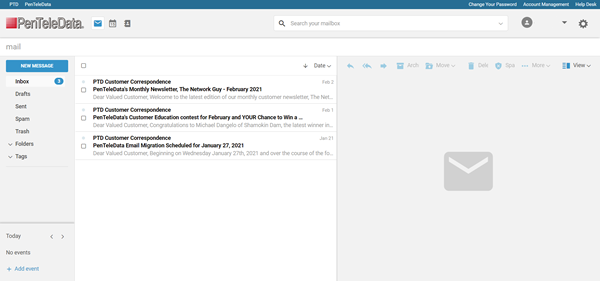
Once you have successfully logged in to "My PenTeleData Webmail" you will see the following screen.
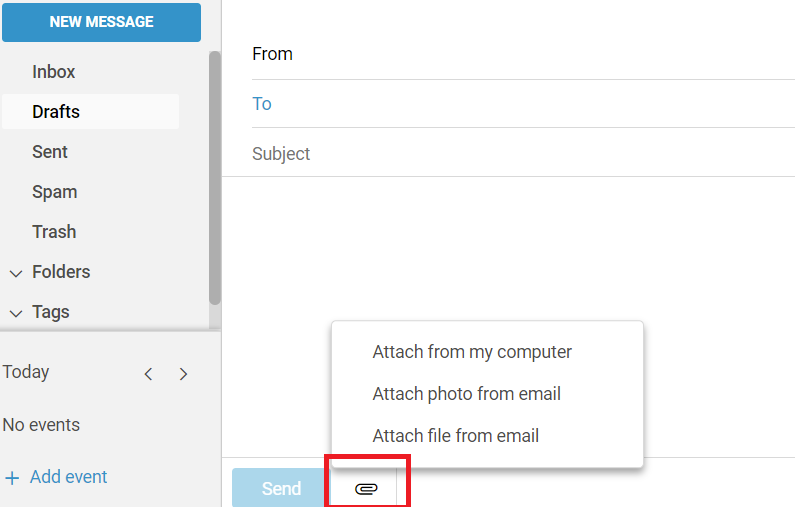
Composing New Message: To create a new e-mail, click on “NEW MESSAGE.” Enter the e-mail address you would like to send too, enter a message to the body. When done, click “Send.”

Adding Attachments: If you wish to add a file, picture, or other form of attachment, simply choose the paper clip option to browse and select what file you wish to attach to your message.
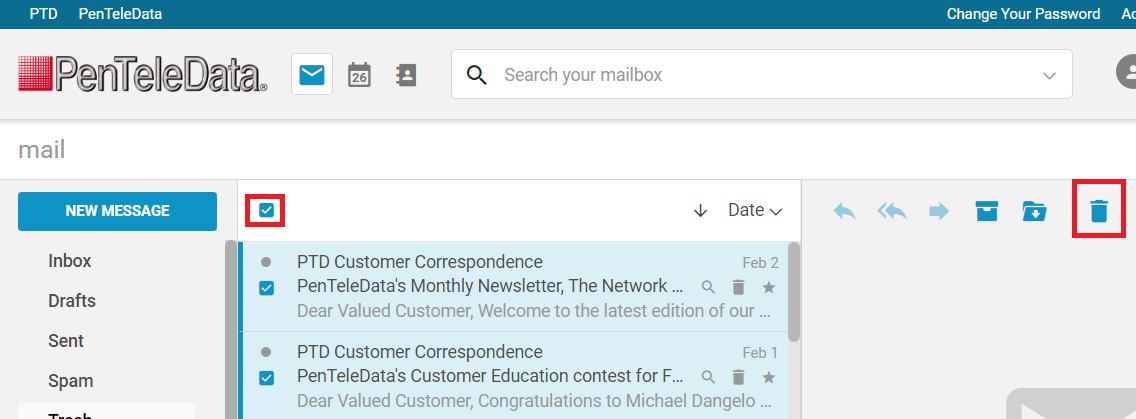
Deleting a Message: If you want to delete a message, you have several options. Select your message and choose one of the following delete options.
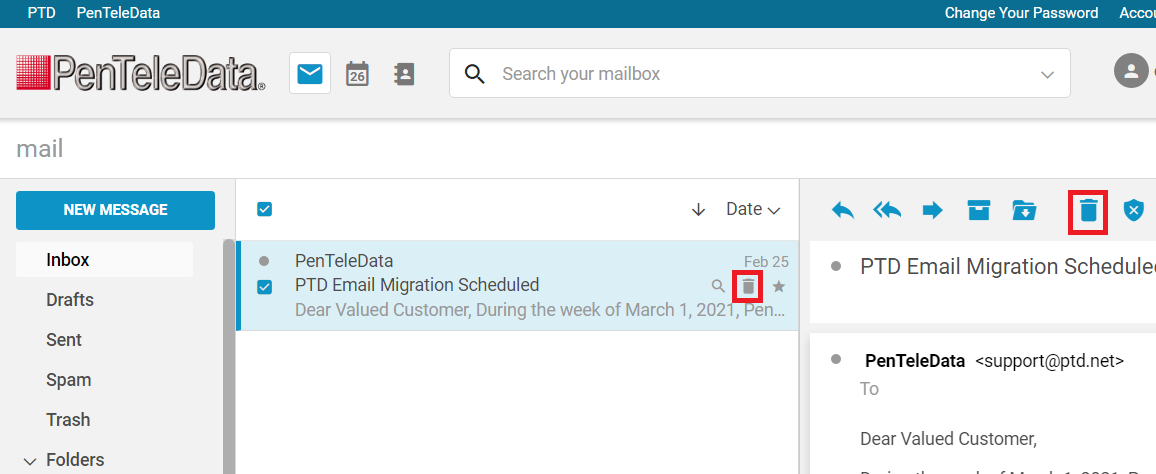
Deleting Multiple Messages: Choose which messages you would like to delete by individually selecting the checkbox to the left of each message. For those wishing to clear an entire folder, you can choose the upper most checkbox. When done select the delete option.
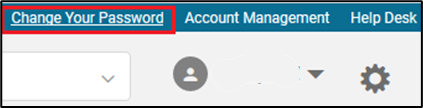
Change Password: If you would like to change the password for your PenTeleData e-mail address, direct access can be found by clicking “Account Management” or click the “Change Your Password” link located in the upper right of Webmail. This will bring you to the Account Management page where you can make the change.
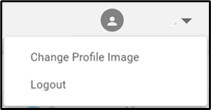
Changing Profile Image: You have the ability to upload a profile image. It is recommended to use a minimum size of 280px x 280px.
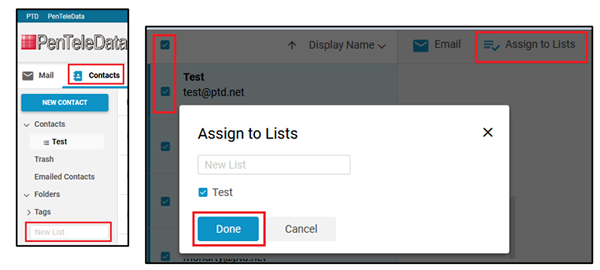
Contact List: To create a contact list within Webmail, click on the “Contacts” tab. In the box labeled “New List,” type in a name for the new list and click “Enter” to create. To add e-mail addresses, place a checkmark to the left of the e-mail addresses to add and then click “Assign to List.” A new list can be created or an already-existing one used. Then click “Done” to finish.
E-mail Forward: To set up an e-mail forward, click on the gear and select “Settings” > “Accounts” and click on the e-mail address listed > scroll to “Access your mail elsewhere,” type the e-mail address you want to forward it to and click “Add.”
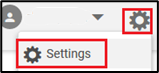

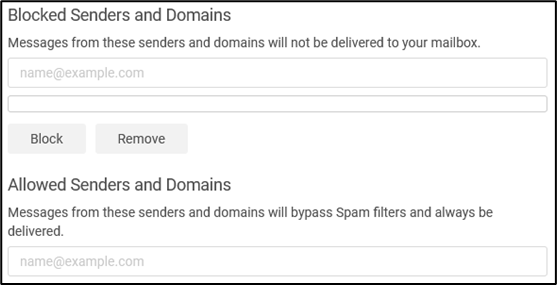
Blocked and Allowed Senders Settings: If you are having issues with Spam, click on the gear and select “Settings” > “Blocked and Allowed Senders,” and add either addresses or the e-mail domain. You can also allow addresses and domains.
E-mail Filters: E-mail filtering is the processing of e-mail to organize it according to specified criteria. Most often, this refers to the automatic processing of incoming messages. E-mail is organized or discarded by using filter criteria such as subject lines, the sender’s e-mail address, e-mail content, date, size, etc.
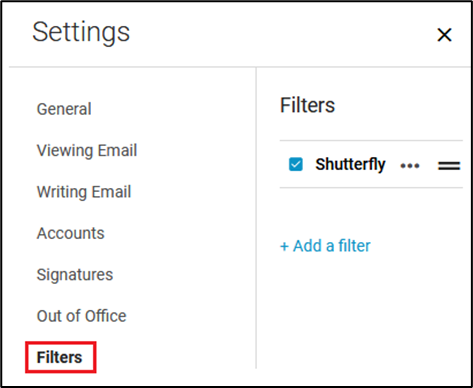
- Click on “Add a filter,” and then choose “Basic or “Advanced” to continue. Mail filters operate on inbound e-mail traffic. Inbound e-mail filtering involves scanning messages to users protected by the filtering system.
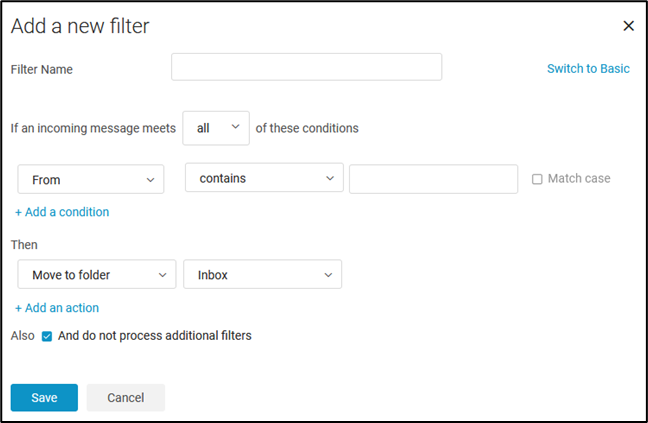
- Add a “Filter Name.”
- The “Filter Name” is a description of the rule being created and is used to label the filter in the event there is more than one listed.
- “If an incoming message meets:” only has the options of “any” or “all.” If this is set to “all,” the e-mail must meet every condition that is made inside of this filter and is better used when filtering e-mail with a specific subject or sender.
- By default, the filter is set to “From.” You have the ability to add multiple criteria for the e-mail filter to use.
- To add a new condition, click “Add a condition.” To remove a condition, place the mouse pointer to the right of the condition and click “X.”
- The section “Then,” informs the filter what to do with the e-mail. There are various options listed. Keep in mind if when choosing “Permanently delete,” you may lose an e-mail that you preferred to keep.
- When finished click the “Save” button to activate the filter.
- Add a “Filter Name.”
Importing/Exporting: You can import contact lists and address books that are saved in a comma-separated (.csv) or .vcf file. After the contacts are imported, they are alphabetized by first name in your address book.
- Go to “Contacts” > “Display Name” > “Import/Export.” Click “Import,” then Browse, and locate the .csv/.vcf file to import and select.
- Click “Open.”
- Click “Import.” Depending on the size of the file, the import might take a few minutes. When the import is complete, click “Contacts” to review the additions.
- NOTE: Depending on how the other e-mail program was configured, it is possible for the contacts list to not import properly. If the listing does not appear you will need to manually correct the information within the Webmail program.
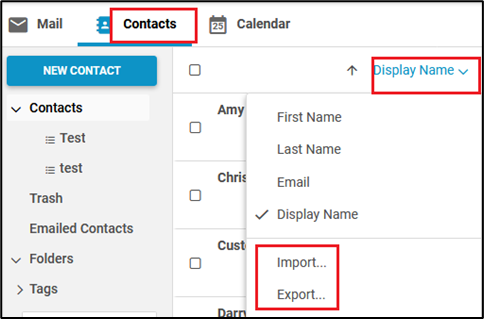
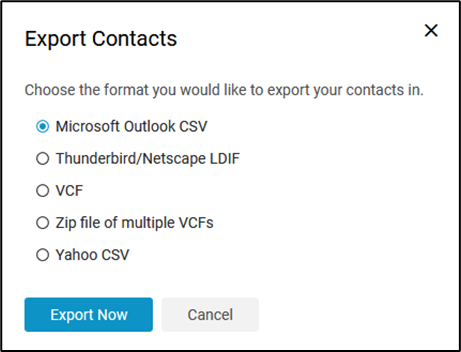
Exporting Contacts: You can export your address books to several file formats (.csv, ldif, vcf).
- Choose “Export” from the options under “Display Name.” Select the format and click “Export.”
- From the “Opening contacts” pop-up, select “Save File” and click “OK.”
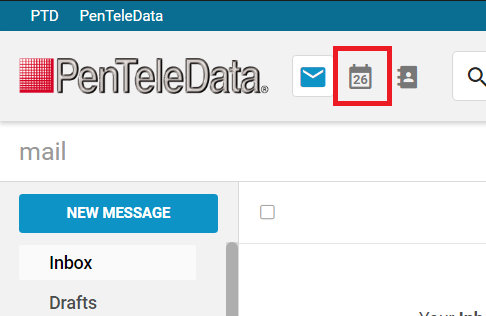
Switching to Calendar View: Choose the calendar icon to access it.
Calendar: This can be used to organize and schedule events for administrative purposes.

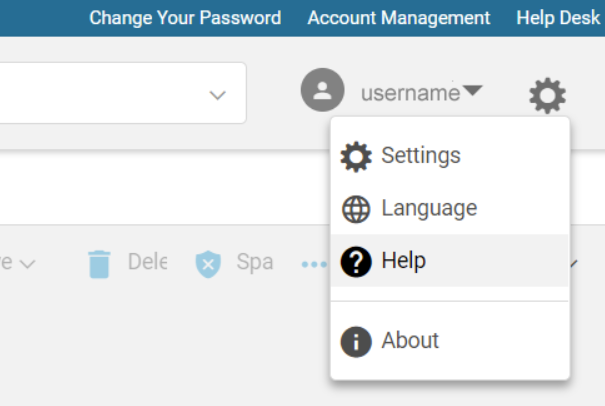
Help: For further assistance with the webmail interface, choose the “Gear” within the upper right of the webmail interface, select “Help.”