These detailed instructions will show you how to configure your laptop computer, using Window 7 Service Pack 1, so you can utilize the PenTeleData Community WiFi internet.
Please note that if you are not using Windows 7 Service Pack 1, you will need to consult the documentation, or manufacturer of your wireless networking equipment, for configuration instructions.
Autodetect
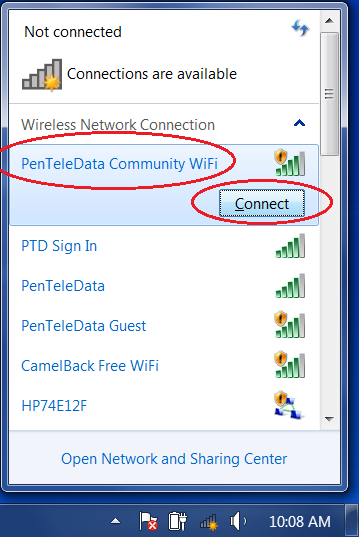
1.Locate the Wireless Network Connections icon on your start menu toolbar.

2.Click on the icon to bring up the available wireless networks in your area. Locate the “PenTeleData Community WiFi” connection, and click on it. Then you click on “Connect”.
3.You should now be connected to the PenTeleData Community WiFi.

4.You can now follow the Login instructions on how to get signed in to the PenTeleData Community WiFi.
Manual
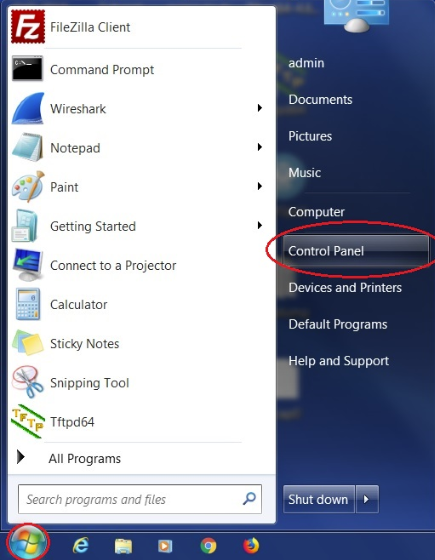
1.Click on “Start”, and then click on “Control Panel”.
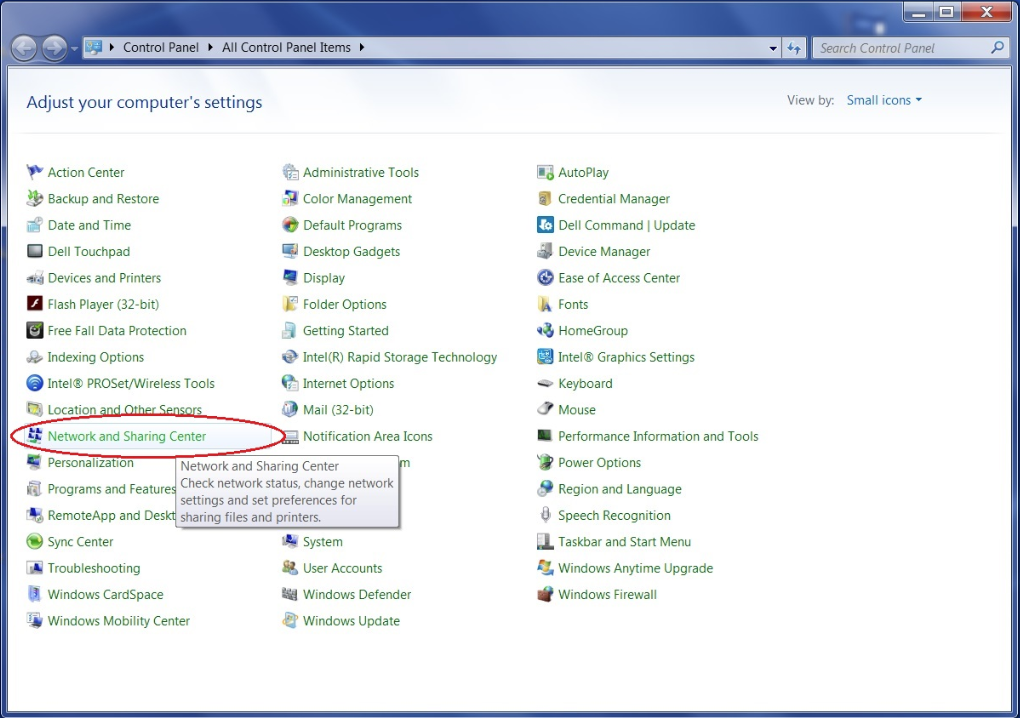
2.Next, find and click on “Network and Sharing Center”.
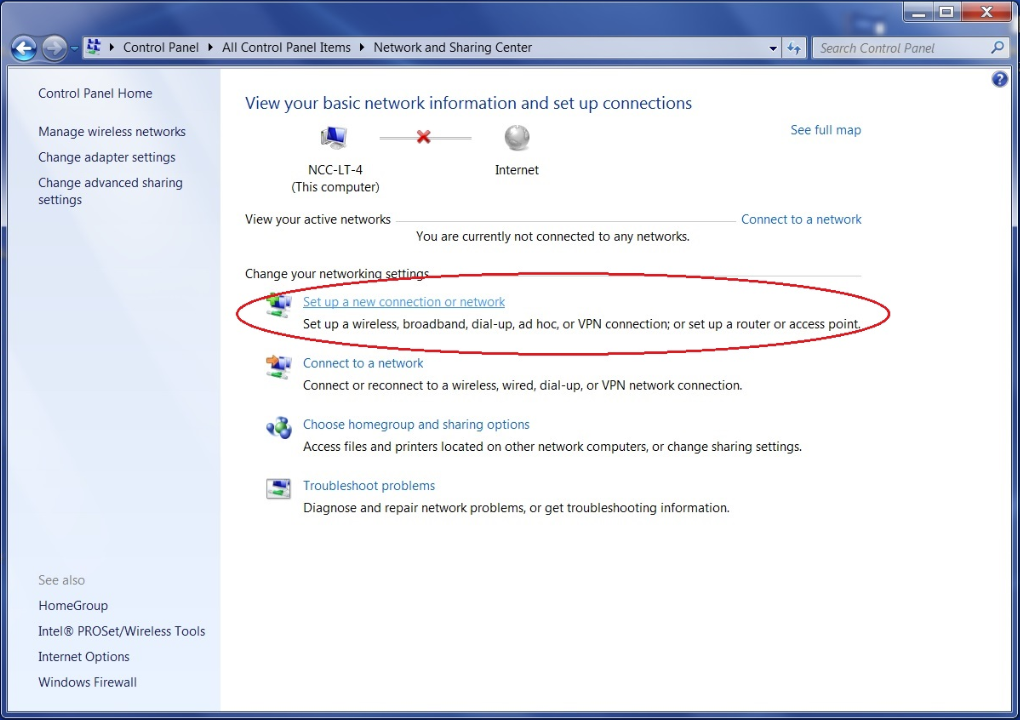
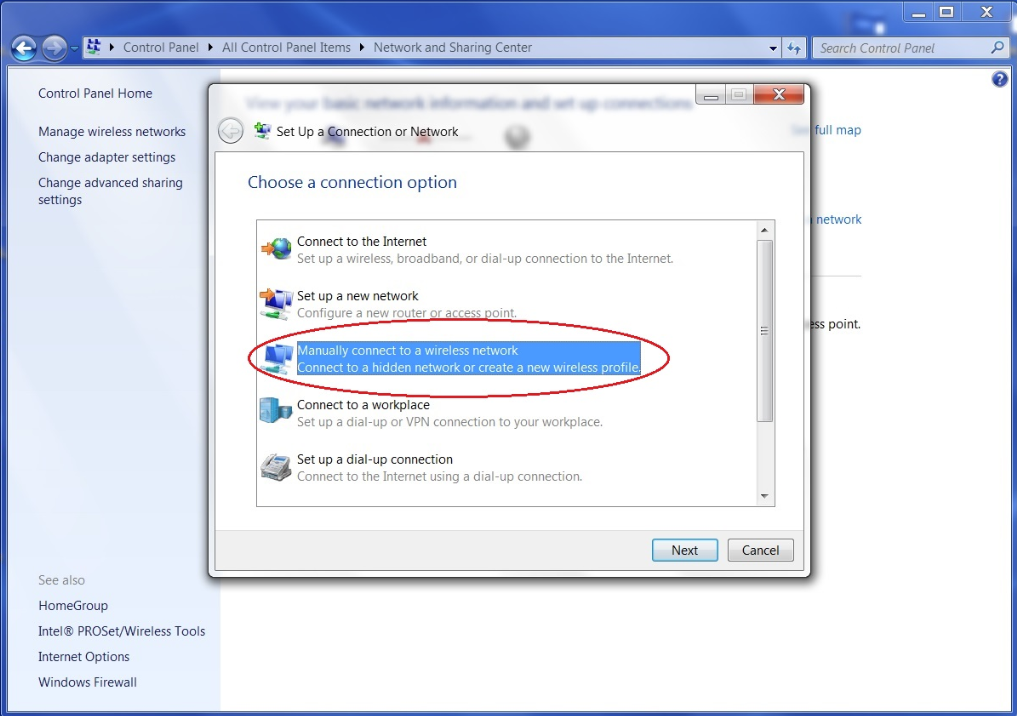
3.Next, find and click on “Set up a new connection or network”.
4.Next, find and click on “Manually connect to a wireless network”.
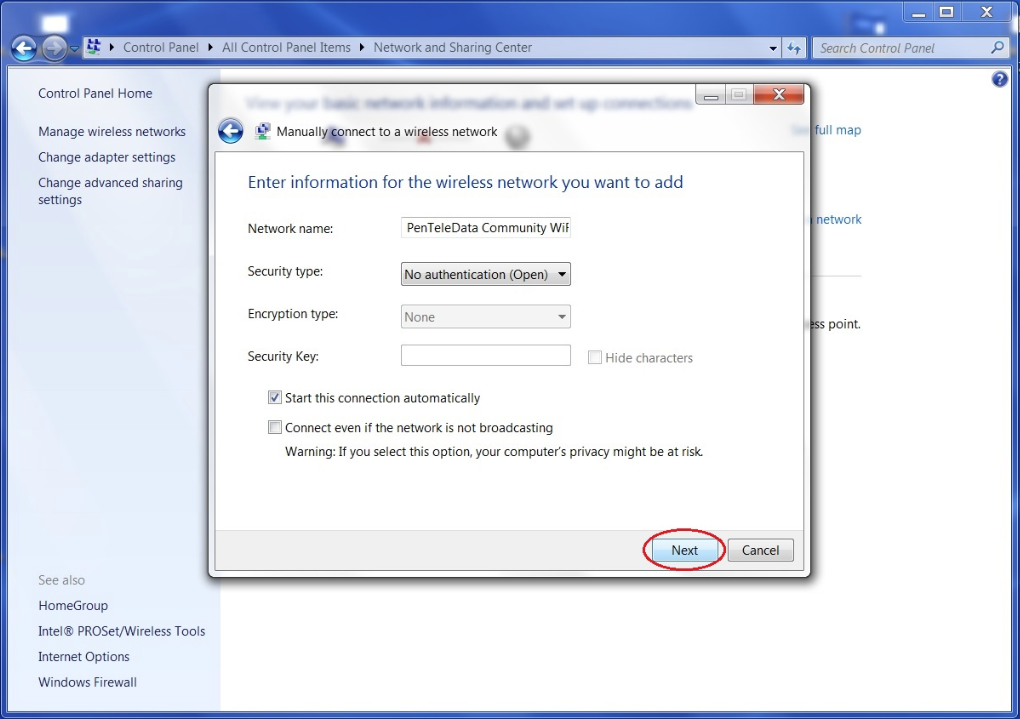
5.Next, fill in the boxes with all appropriate information:
a.Network name: PenTeleData Community WiFi
b.Security type: No authentication (Open)
c.Encryption type: None
d.Security Key: ***leave this blank***
e.Click the box next to “Start this connection automatically” to check the box.
f.Click “Next” when you’re finished with the prior steps.
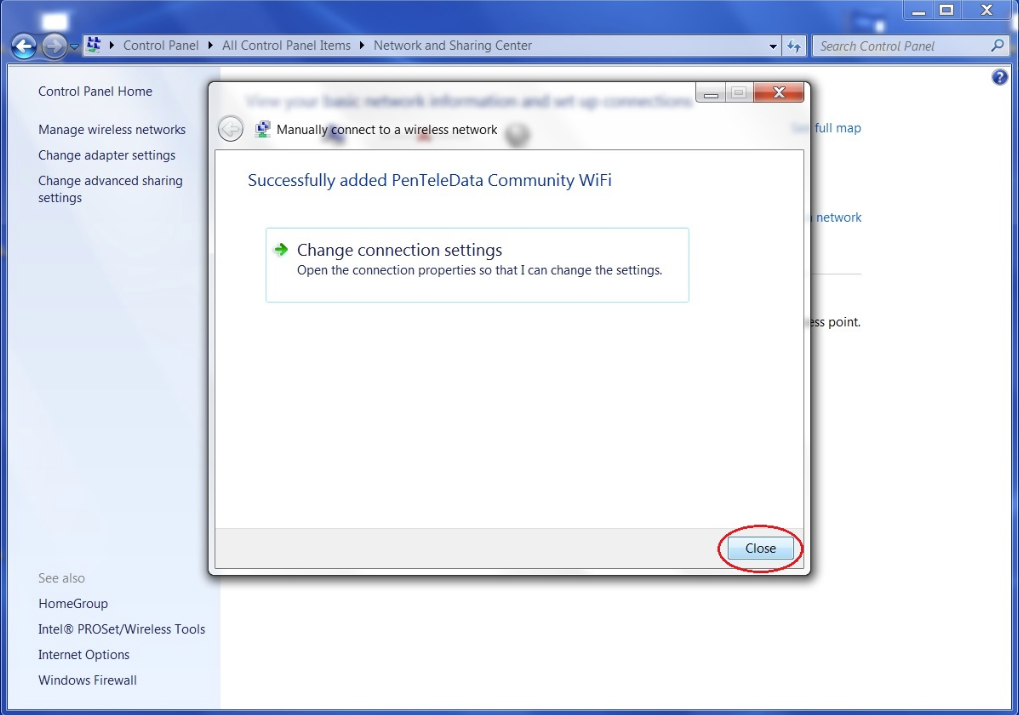
6.You have successfully added the PenTeleData Community WiFi connection. Simply click “Close”.
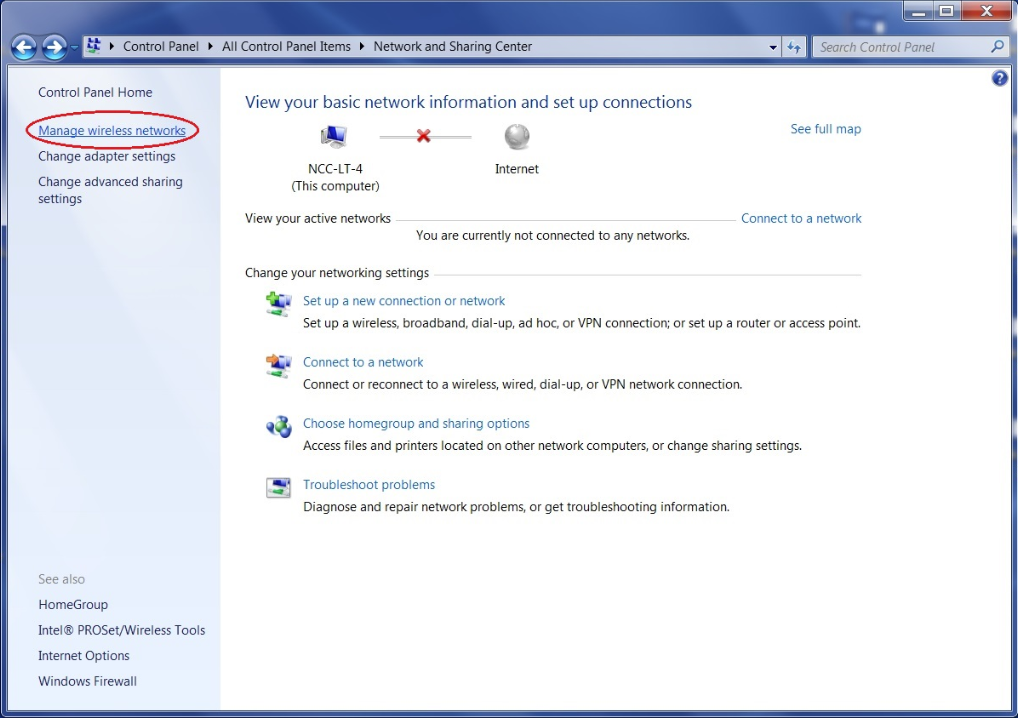
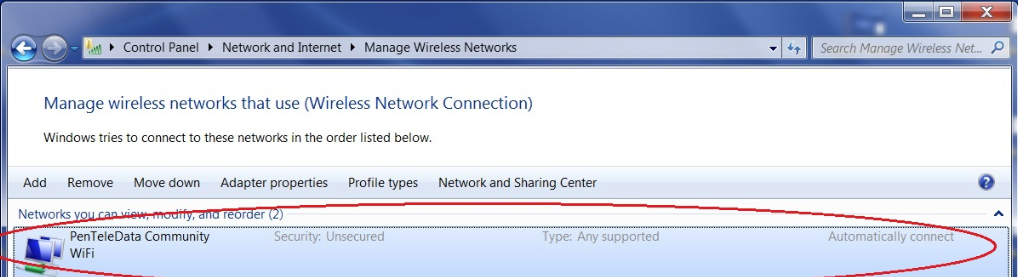
7.Now, you should be back at the Network and Sharing Center. In the top left corner, find and click on “Manage wireless networks”.
8.Next, find the PenTeleData Community WiFi connection in the list and double-click on it.
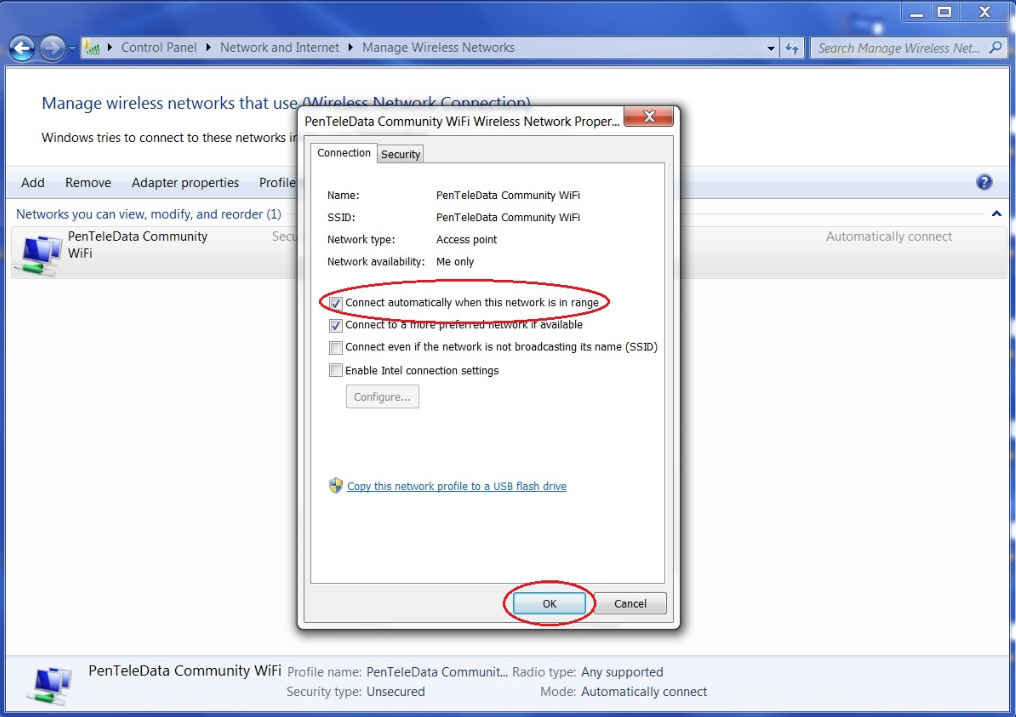
9.This will open the Properties window for the PenTeleData Community WiFi connection. Verify that the “Connect automatically when this network is in range” option is checked. If it’s not, click on the empty box to check it. Afterwards, click “OK” in the bottom right of the properties window.
10.Once you’re connected to the PenTeleData Community WiFi connection, you can now follow the Login instructions on how to get signed in to the PenTeleData Community WiFi.