Google Chrome Windows & Macintosh (Block Popups)
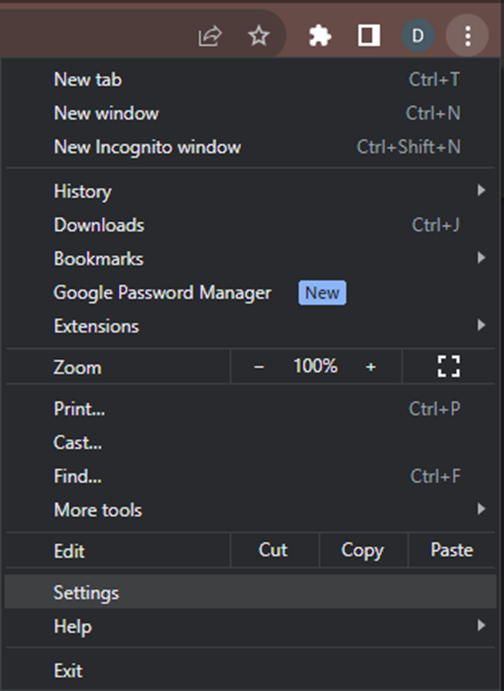
- Begin by opening Google Chrome and select "Settings" from the menu at the top right of the window.
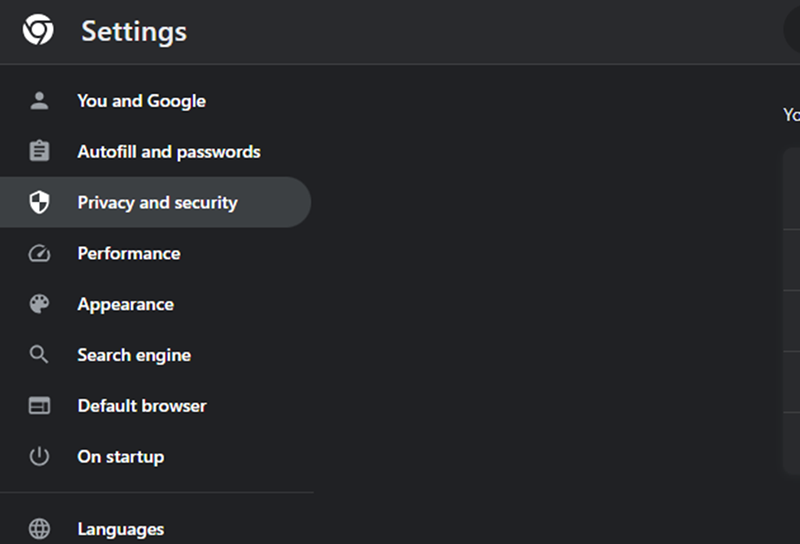
2. Click on "Privacy and security.”
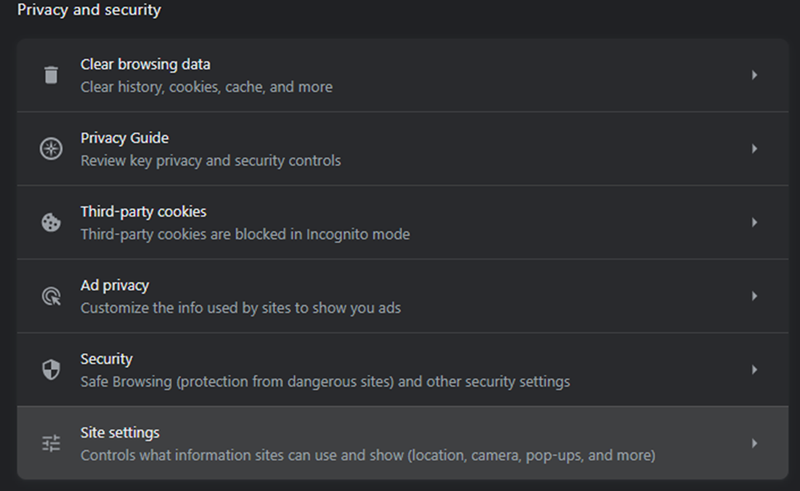
3. Under "Privacy and security", click on "Site settings."
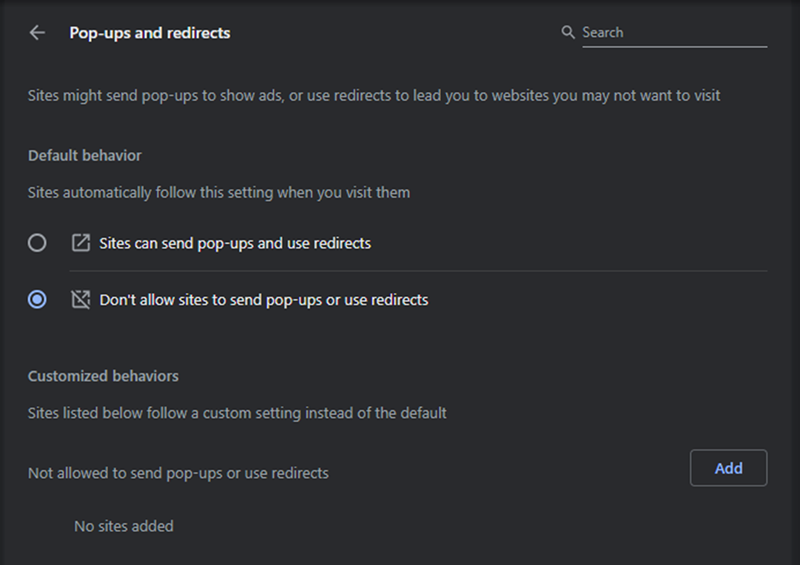
4. Scroll down to "Pop-ups and redirects" and select "Don’t’ allow sites to send any pop-ups or user redirects." Alternatively, if you need to add a pop-up, you can use the “Add” option and enter the web address.
5. When done, close the “Settings” tab.