Macintosh Sonoma + (Cable modem setup)
Normally, Mac OS X will allow you to connect to the Internet automatically when a cable modem is attached to the PC without the need to change any settings. If your cable modem is not allowing you to access the Internet, these instructions will walk you through the process of checking the necessary settings in Mac OS X. Please note that your cable modem must be connected via Ethernet in order to follow these instructions.
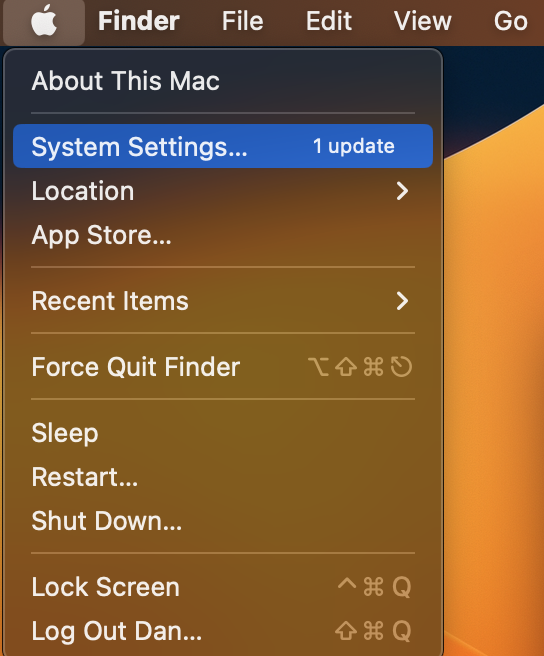
1. Begin by clicking on the "Apple" in the top left corner of your screen and select "System Settings."
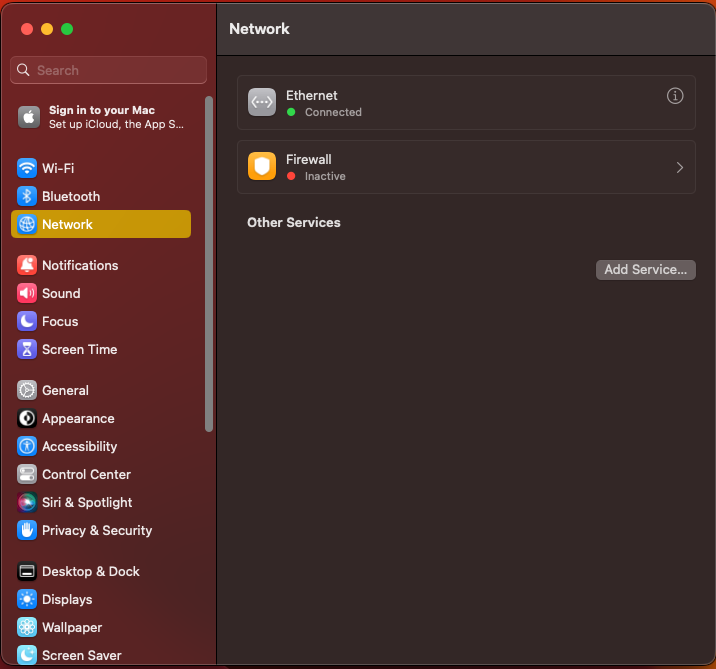
2. The "System Settings" window will now appear. Click "Network" to proceed and select "Ethernet."
3. Click “Ethernet” to "Configure IPv4" and select "Using DHCP."
4. Finally, click on "OK." Close "System Settings" control panel by clicking on the close button in the upper left.