Macintosh Thunderbird App (IMAP Setup)
1.Open Mozilla “Thunderbird Mail “by either selecting the “Thunderbird” icon from the Macintosh “Dock” or by selecting “Go” from the pull-down menu and selecting “Applications.”
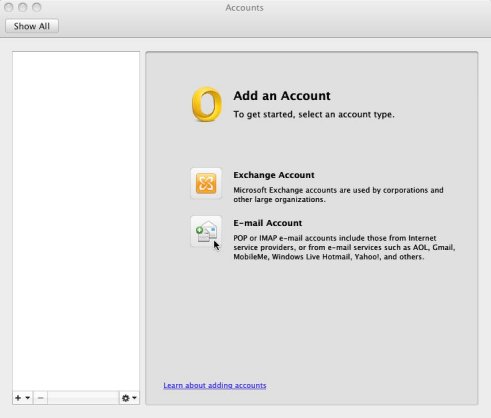
2. Thunderbird will now open, from the below action items, under the heading “Set up an account,” choose “Email.”
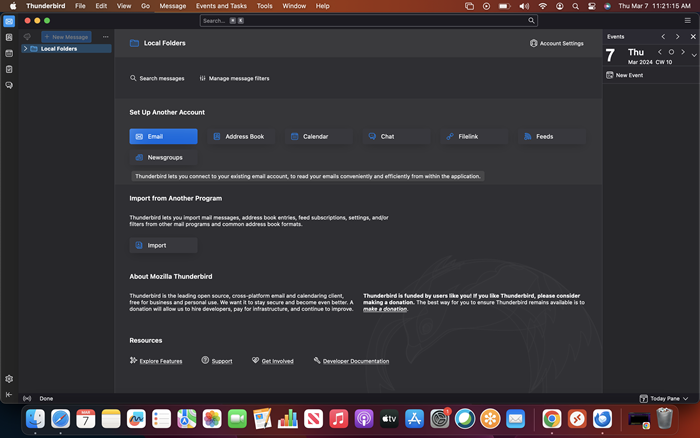
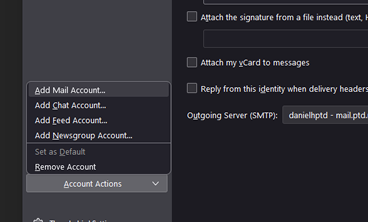
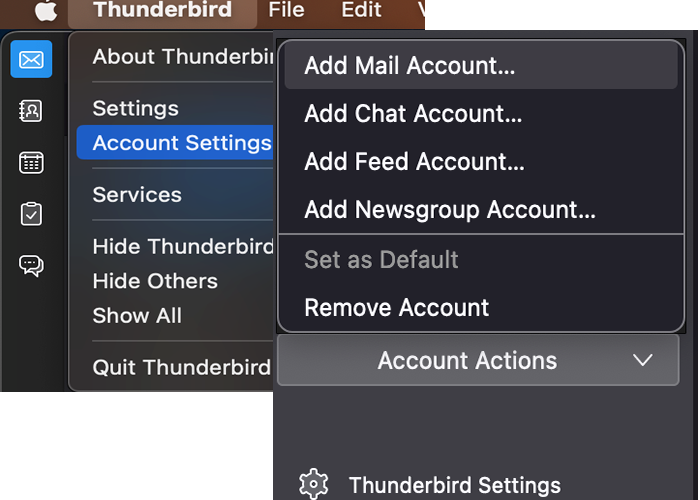
NOTE: if this dialogue windows does not appear, click on "Account Settings" from the lower left-hand menu. Next, choose "Add Mail Account."
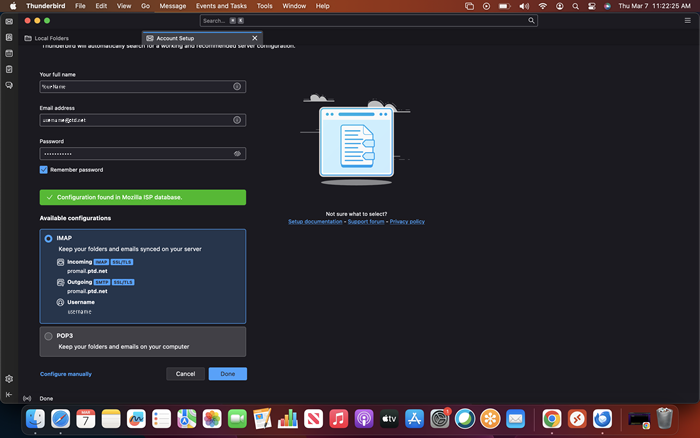
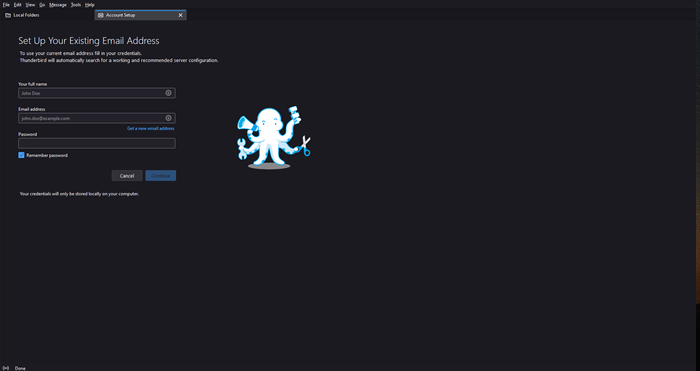
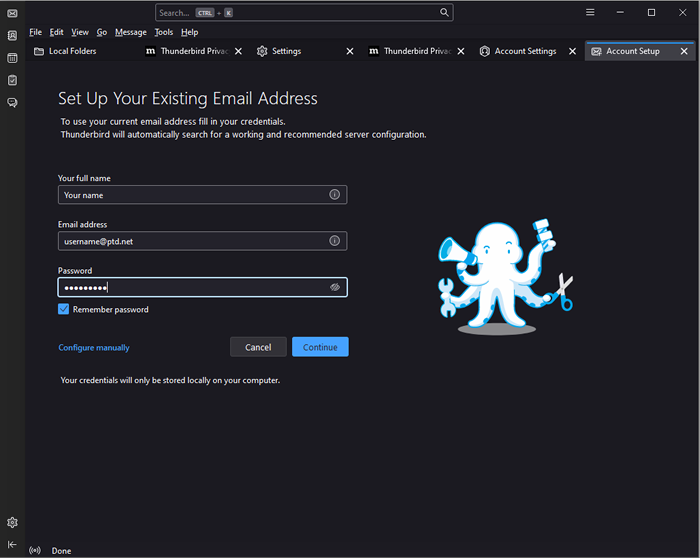
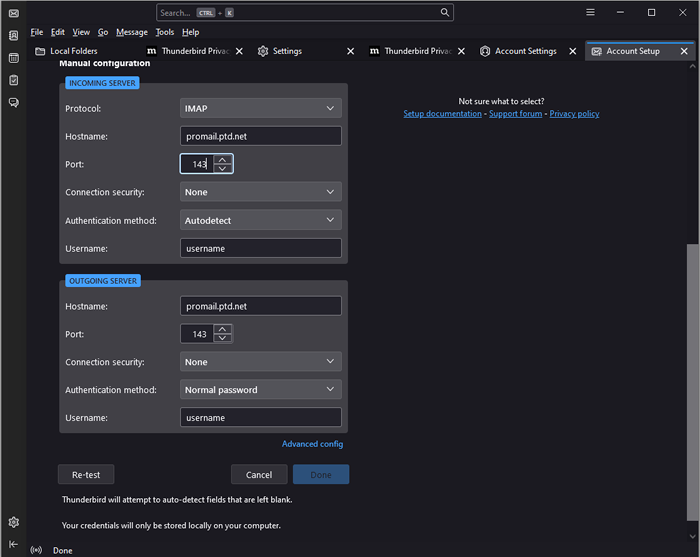
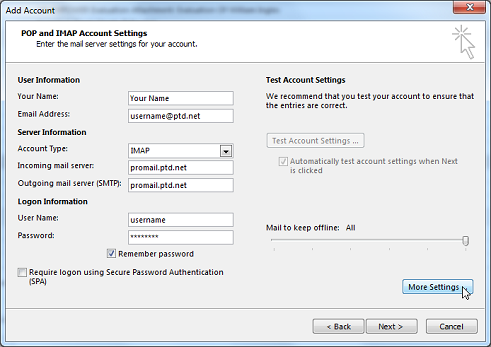
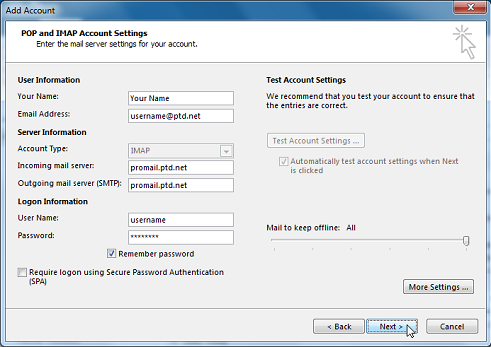
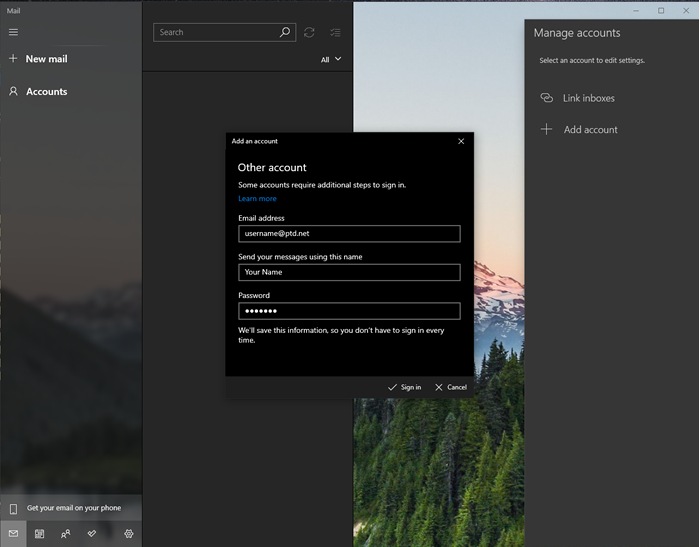
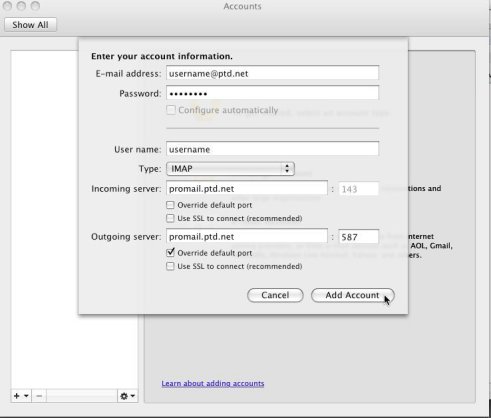
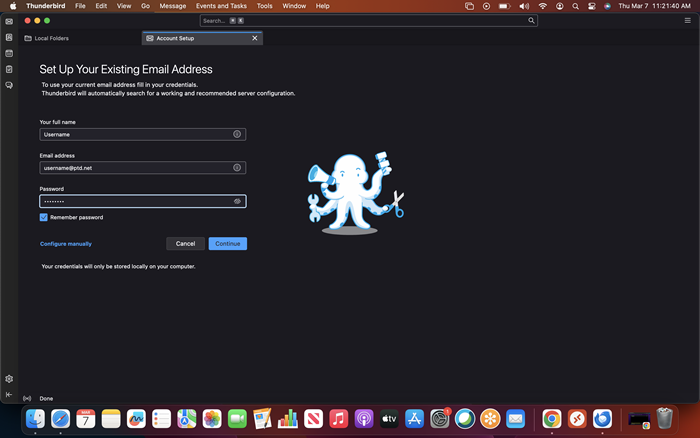
3. The “Set Up and Existing Email Account” dialogue window will now appear. Enter the following information in the available fields:
“Your name:” enter your name as you would like it to appear when people receive email from you.
"Email address:" username@ptd.netenter your PenTeleData email address.
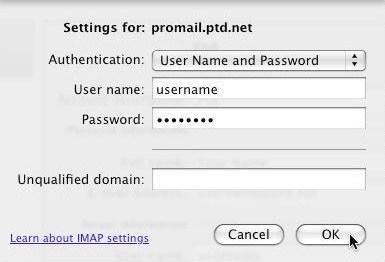
"Password:" enter the password that corresponds to your "Email address" entered above. When typing your password, only a series of "***" will appear for password confidentiality.
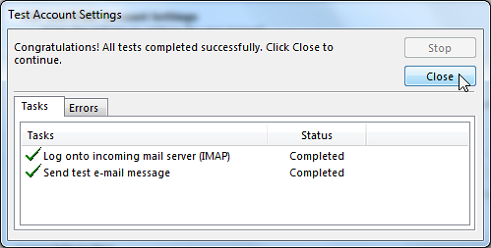
Next, click on “Continue.” Mozilla Thunderbird will reach out and configure the remainder of the settings.
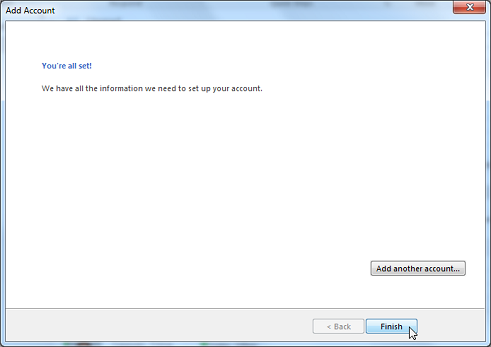
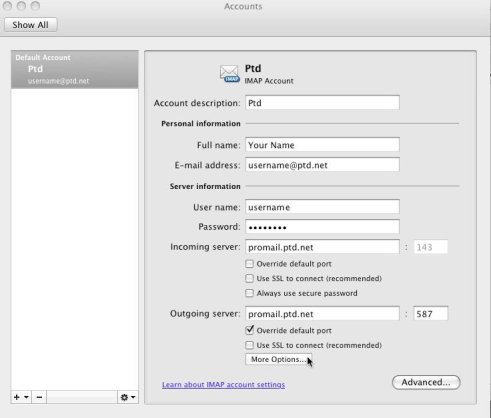
4. After clicking on “Continue,” Mozilla should return with the matching results. To complete the configuration, click “Done.”