Please note, if you already have an existing POP3 account created, please do not remove the account as this will cause all dated email to be permanently deleted.
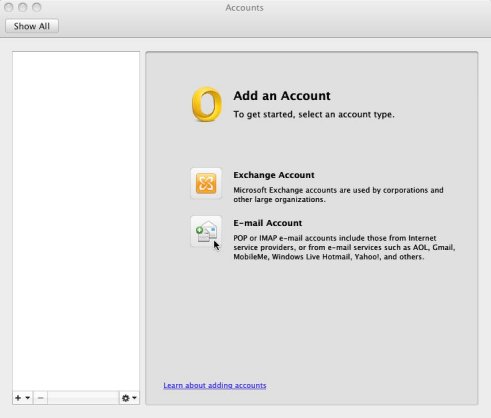
1. Begin by opening up Outlook 2011. Once the program is open the “Add an Account” wizard will open. Click “email Account” to continue.
If the wizard does not appear, your email program may already be configured to send and receive email, please contact Technical support at (800) 281-3564.
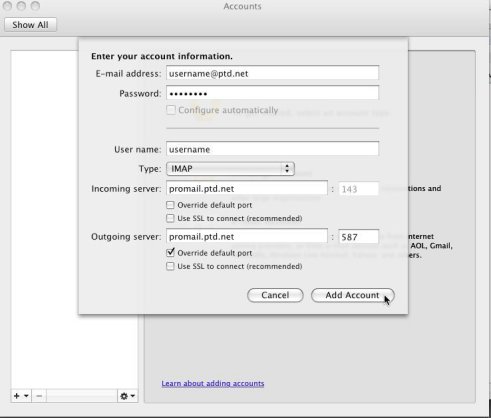
2. In the box labeled “email address:", enter your username followed by “@ptd.net” in all lower case.
3. In the box labeled “Password:", enter the password that corresponds to you username. When typing your password only a series of “***” will appear for the password confidentiality.
Note: Username and passwords are case-sensitive. Please be certain that your capitalization is correct.
4. In the box labeled "User name:", enter the beginning part of your PenTeleData email address. This is everything before the "@ptd.net".
5. From the “Type:” drop down box select "IMAP".
6. In the box labeled "Incoming server:", enter “promail.ptd.net” in all lower case.
7. In the box labeled "Outgoing server:", enter “promail.ptd.net” in all lower case.
8. Place a check in the box next to "Override default port" and change the port to "587".
9. When your screen resembles the window below, click "Add Account".
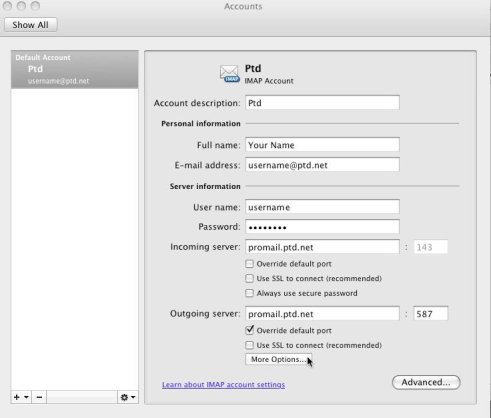
NOTE: For those security conscious customers or customers normally accessing e-mail over wireless connections (Secure or non-secure), please place a check mark in “Use SSL to connect (recommended).”
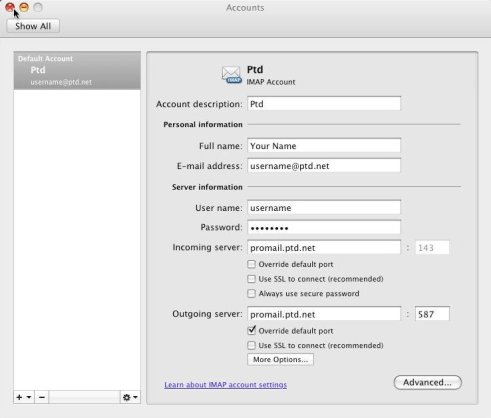
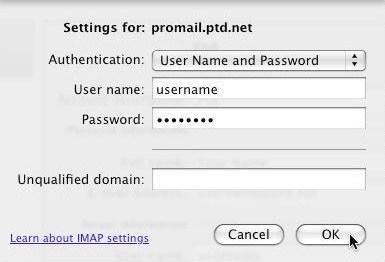
10. Click “More Options…".
11. From the "Authentication:" drop down box select "User Name and Password".
12. In the box labeled "User name:", enter the beginning part of your PenTeleData email address. This is everything before the "@ptd.net".
13. In the box labeled "Password:", enter the password that corresponds to you username. When typing your password only a series of “***” will appear for the password confidentiality.
Note: Username and passwords are case-sensitive. Please be certain that your capitalization is correct.
14. When your screen resembles the window below click "OK".
15. You will now be returned to the “Accounts” screen. Click on the close button.