These instructions will guide you through troubleshooting connectivity issues with your broadband cable modem using Windows 11. This procedure is useful when experiencing difficulty in connecting or maintaining a connection to the Internet. After reading these instructions, you may want to copy and save it on your computer for future reference.
Before continuing, if you are currently able to access the Internet, you can check the PenTeleData Network Status page to see if there are any outages that may affect your Internet access.
Checking for Standby
On certain cable modems, there is a standby feature that will disable access to the Internet via USB and Ethernet connections. If you are using a Motorola Surfboard or an Arris cable modem, check for this first. If your cable modem does not have the standby feature, proceed to the next section (Resetting the Cable Modem).
1. Check for the standby indicator. On the Motorola Surfboard cable modem the “Standby” LED will be lit. On the Arris cable modem the “Online” LED will be flashing. Complete list of cable modem light patterns (for cable modems distributed to broadband customers).
2. If the cable modem is not in standby, proceed to the next section (Resetting the Cable Modem). If the cable modem is in standby, press the “Standby” button, which is usually located on the top or back of your cable modem.
3. After your broadband cable modem returns to normal operating mode, restart your computer, and try accessing the Internet. If you are still unable to access the Internet, proceed to the next section (Resetting the Cable Modem).
Resetting the Cable Modem
1. Turn your computer off, disconnect the power from your router (if applicable), then disconnect the power from the back of the cable modem.
2. Wait approximately 2 minutes.
3. Reconnect the power to the back of the cable modem.
4. Your cable modem’s LEDs should begin to flash as the cable modem connects. Within a few minutes the cable modem should be online.
5. After the cable modem is online, plug in the power to your router (if applicable), and then turn on your computer. After Windows has reached the desktop, try browsing several websites. If you are still unable to access the Internet, try renewing your IP address as explained in the next section.
Windows 11 IP Configuration
Close all applications or programs that may be open.
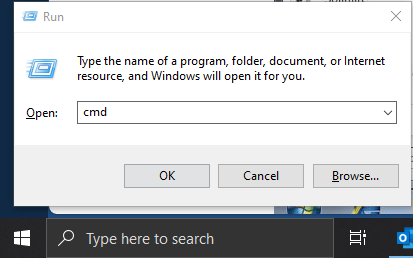
1. Click the “Windows” menu, in the “Search programs and files” box type in “cmd” (without the quotes) then hit “Enter” on your keyboard or choose “OK.”
2. Type “ipconfig” (without the quotes) and press “Enter” on your keyboard.
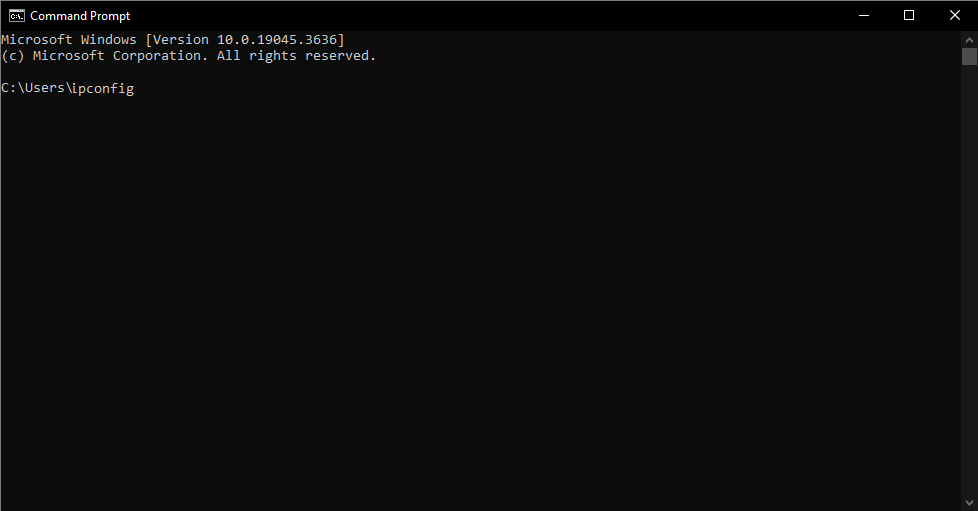
3. Your IP address should now be displayed as shown in the window below.
Diagnosing Network Connections
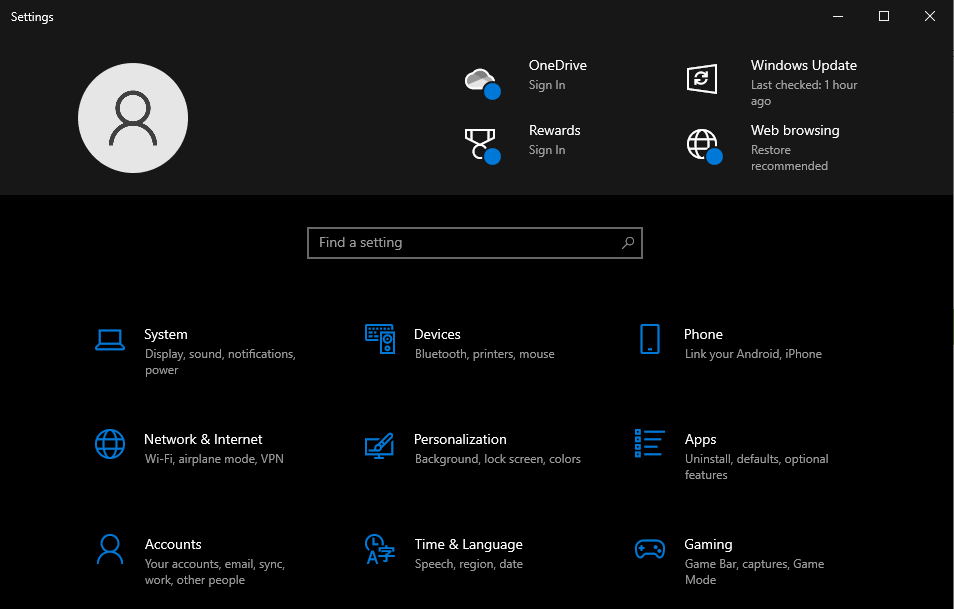
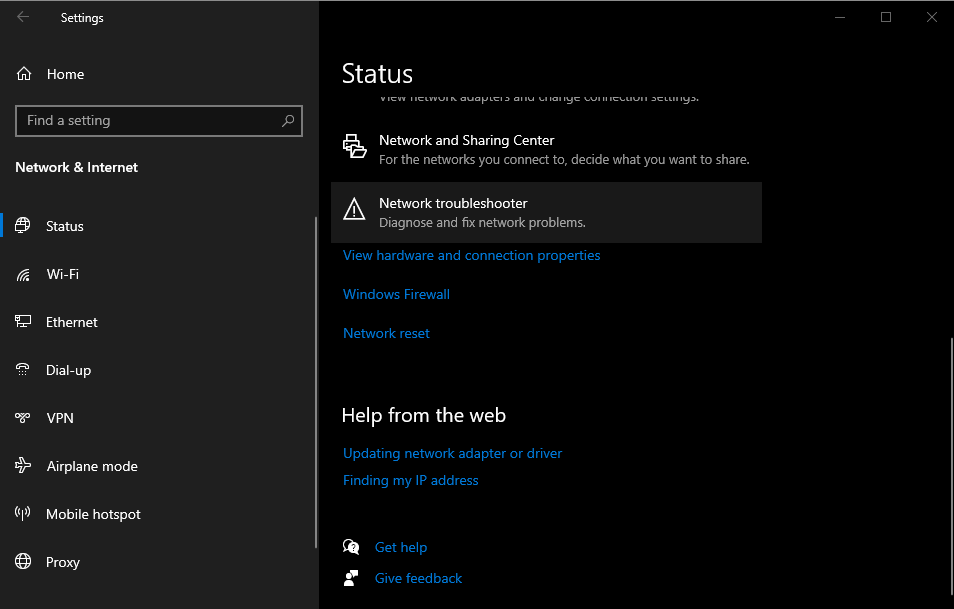
1. Begin by opening “Control Panel,” and navigate to “Network & Internet.”
2. The “Network and Internet” status will now appear. Scroll down on the right pane until you find “Network troubleshooter,” and select this option.
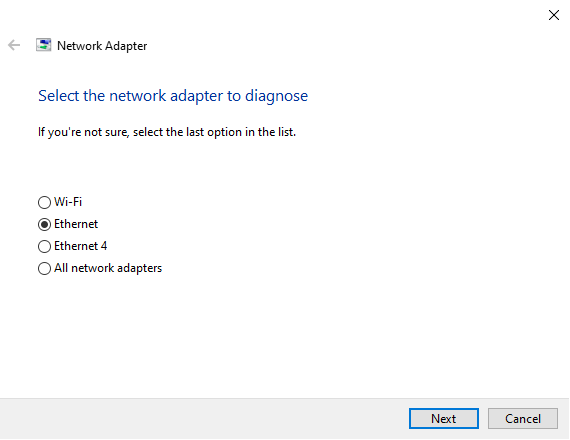
3. The “Network troubleshooter” dialogue will now appear. Please make the appropriate selection and choose “Next.”
4. If windows is not able to find any problems with the connection click “Close.” Otherwise, follow the prompts.