These instructions will guide you through blocking and unblocking HTML content in your email software. Note: Although allowing HTML content in your email is generally a safe practice, you should always have your anti-virus scan all incoming email to ensure that they are virus free.

Outlook Express 6

1. Open Outlook Express by double-clicking your "Outlook Express" icon on your "Desktop" or by clicking the "Outlook Express" icon from the start menu.

2. To begin, choose "Options…" from the "Tools" menu.

3. Select the "Security" tab to continue.

4. Under the "Download Images" heading, uncheck the checkbox next to "Block images and other external content in HTML email" to allow HTML formatted emails to display properly. Alternatively if you would like to block HTML content, place a check in the check box next to "Block images and other external content in HTML".

5. Click "OK" to finish.

Windows Live Mail

1. Open Windows Live Mail by double-clicking your "Windows Live Mail" icon on your "Desktop" or by clicking the "Windows Live Mail" icon from the start menu.

2. To begin, choose "Safety options…" from the "Tools" menu. If you do not see the "Tools" menu, click "Show menu bar" from the "Menu" button.

3. Select the "Security" tab to continue.

4. Under the "Download Images" heading, uncheck the checkbox next to "Block images and other external content in HTML email" to allow HTML formatted emails to display properly. Alternatively if you would like to block HTML content, place a check in the check box next to "Block images and other external content in HTML".

5. Click "OK" to finish.

Windows Live Mail 2011

1. Begin by opening up Windows Live Mail 2011. Click on the "Windows Mail" button and select "Safety options…" from the "Options" menu.

2. Select the "Security" tab to continue.

3. Under the "Download Images" heading, uncheck the checkbox next to "Block images and other external content in HTML email" to allow HTML formatted emails to display properly. Alternatively if you would like to block HTML content, place a check in the check box next to "Block images and other external content in HTML".

4. Click "OK" to finish.

Windows Mail

1. Open Windows Mail by double-clicking your "Windows Mail" icon on your "Desktop" or by clicking the "Windows Mail" icon from the start menu.

2. To begin, choose "Options…" from the "Tools" menu.

3. Select the "Security" tab to continue.

4. Under the "Download Images" heading, uncheck the checkbox next to "Block images and other external content in HTML email" to allow HTML formatted emails to display properly. Alternatively if you would like to block HTML content, place a check in the check box next to "Block images and other external content in HTML".

5. Click "OK" to finish.

Microsoft Outlook 2007

1. Open Microsoft Office Outlook 2007 by double-clicking your "Microsoft Office Outlook 2007" icon on your "Desktop" or by clicking the "Microsoft Office Outlook 2007" icon from the start menu.

2. To begin, choose "Trust Center…" from the "Tools" menu.


3. Select the "Automatic Download" tab to continue.

4. Uncheck the checkbox next to "Don’t download pictures automatically in HTML email messages or RSS items" to allow HTML formatted emails to display properly. Alternatively if you would like to block HTML content, place a check in the box next to "Don’t download pictures automatically in HTML email messages or RSS items".

5. To finish click "OK".

Windows Live Mail

  1. Open Windows Live Mail by either selecting the “Windows Live Mail” icon from the Windows “Desktop” or by selecting the “Windows Live Mail” icon from the “Start” menu (known as the “Windows” menu in Vista and Windows 7).
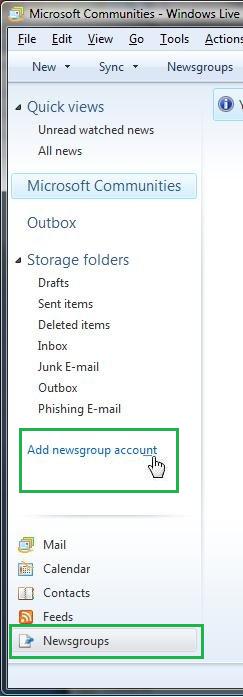
  2. In the Windows Live Mail window, select "Newsgroups” on the bottom left-hand corner of your screen, then select “Add newsgroup account” from the menu above.
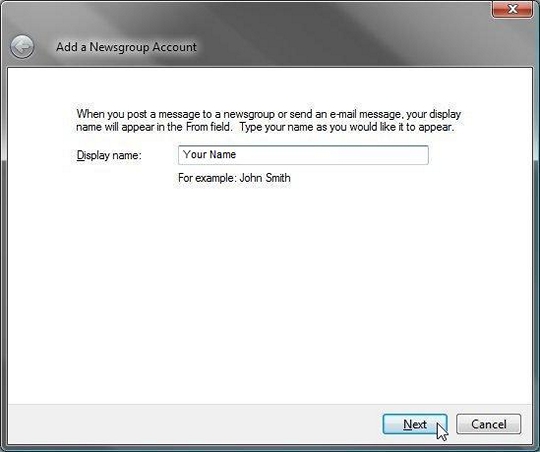
  3. The newsgroup setup wizard will ask for a "Display name". Enter your name as you would like it to appear when people view your newsgroup postings. When you are finished, click "Next".
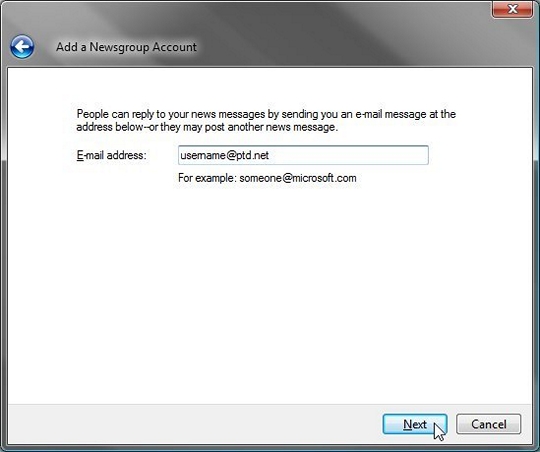
  4. In the box labeled "E-mail address", enter your username followed by "@ptd.net" in all lower case letters. When you are finished, click "Next".
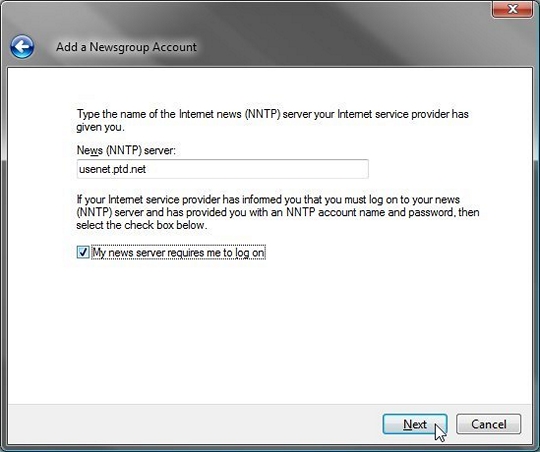
  5. In the box labeled "News (NNTP) server", enter "usenet.ptd.net" in all lower case letters, without the quotation marks. Place a check in the box below labeled "My news server requires me to log on", and click "Next".
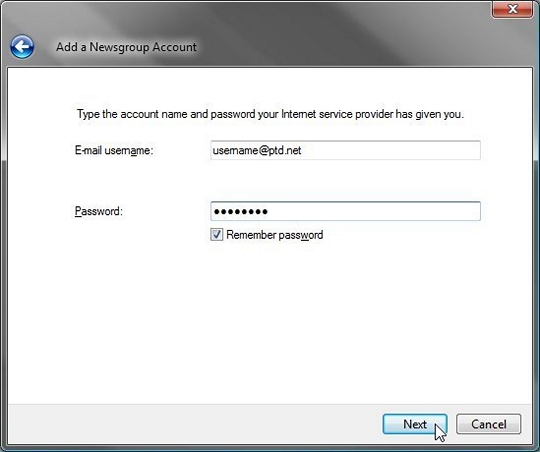
  6. In the boxes labeled "E-mail username", and "Password", enter the username and password for the account you will be using to access the Usenet server. Click "Next" to continue.
  7. Standard accounts (Dial-up, cable modem, and DSL) must use their complete PenTeleData e-mail address as their username (i.e. Username: johndoe@ptd.net) and the corresponding password to login to the PenTeleData Usenet server.
  8. If you have an "Individual Usenet Account" or "Commercial Usenet Account", you must use the Usenet login and password that was assigned to you. Please ensure that you are using your "complete" login including "@ptd.net" (i.e. Username: news00000005@ptd.net).
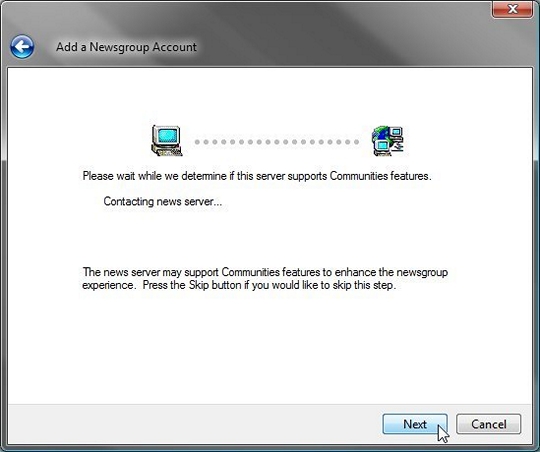
  9. The following screen will appear, it will automatically check determine and if the server supports the "Communities feature."
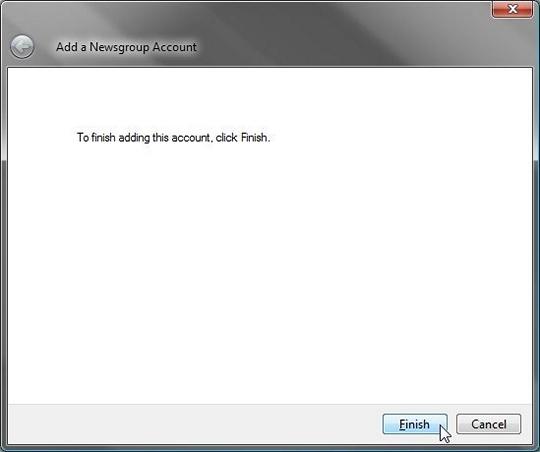
  10. Click the "Finish" button to exit the account setup wizard.
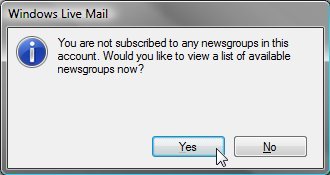
  11. A "Windows Live Mail" dialogue box will now appear asking you if you would like to view available newsgroups.
  12. If you chose "Yes", then Windows Live Mail will search and list every available forum on usenet.ptd.net. At this point you will also be able to edit your Microsoft Communities settings from the "Manage Newsgroups" window.


Note: The “Microsoft Community feature is a listing of Microsoft Newsgroup forums. For more information regarding Microsoft Communities, please visit microsoft.com  and search for keywords "Microsoft Communities".

Microsoft Outlook 2010

1. Begin by opening up Outlook 2010. Click on the "File" menu and select "Options".

2. The "Outlook Options" window will now open. Select "Trust Center" from the left window pane.

3. Click the "Trust Center Settings…" button.

4. The "Trust Center" will now open. "Automatic Download" should automatically be selected, if it is not select it. Uncheck the checkbox next to "Don’t download pictures automatically in HTML email messages or RSS items" to allow HTML formatted emails to display properly. Alternatively if you would like to block HTML content, place a check in the box next to "Don’t download pictures automatically in HTML email messages or RSS items".

5. Click "OK" to return to the "Outlook Options".

6. To finish click "OK".